If you don’t already know Halloween is this Tuesday, which means everyone is attending Halloween parties this weekend to celebrate- or in my case sitting at home staring at Pinterest for hours while The Office plays in the background. I really like Pinterest because it’s full of fun DIYs that you can make, like snacks, games, decorations, games, and more. Some are very complicated and require expensive materials, which when it’s all said and done it just makes more sense to go buy the actual product in a store.
A few days ago I started saving the simple little snacks and treats that are of course Halloween themed because it’s October and the whole month is dedicated to Halloween. I decided I needed to share three of my favourite things I saw on Pinterest because not many of my friends go on Pinterest and there is some really cool stuff. The following are three Halloween DIYs are for those Beginner, Advanced, and Professional lever DIY-ers. All product prices will be listed at the very bottom.
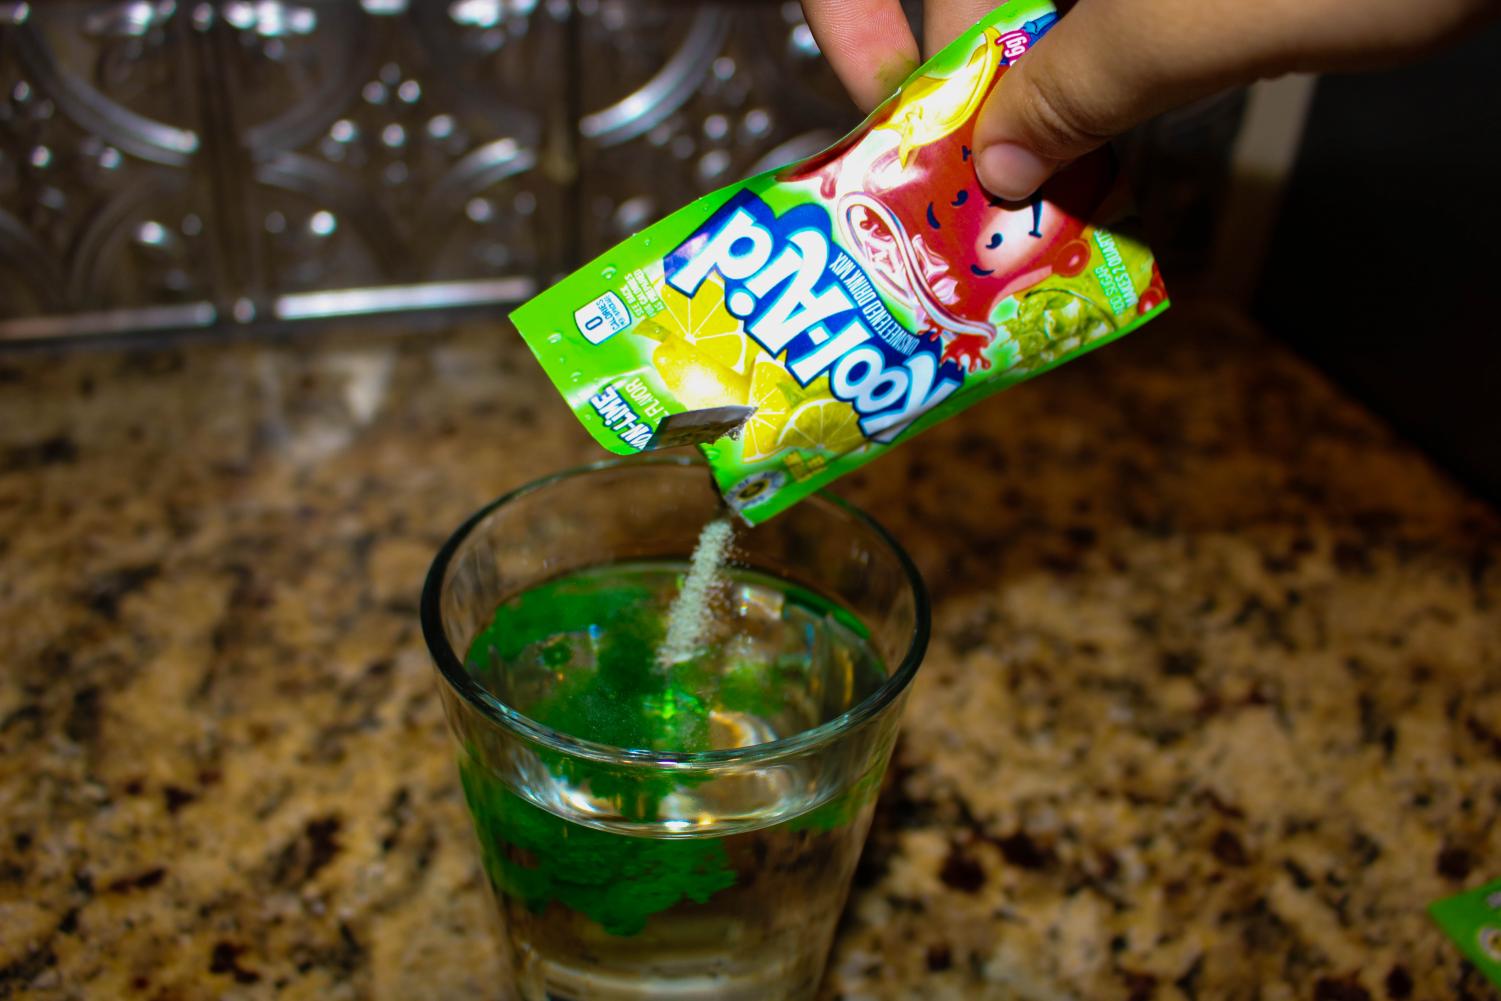
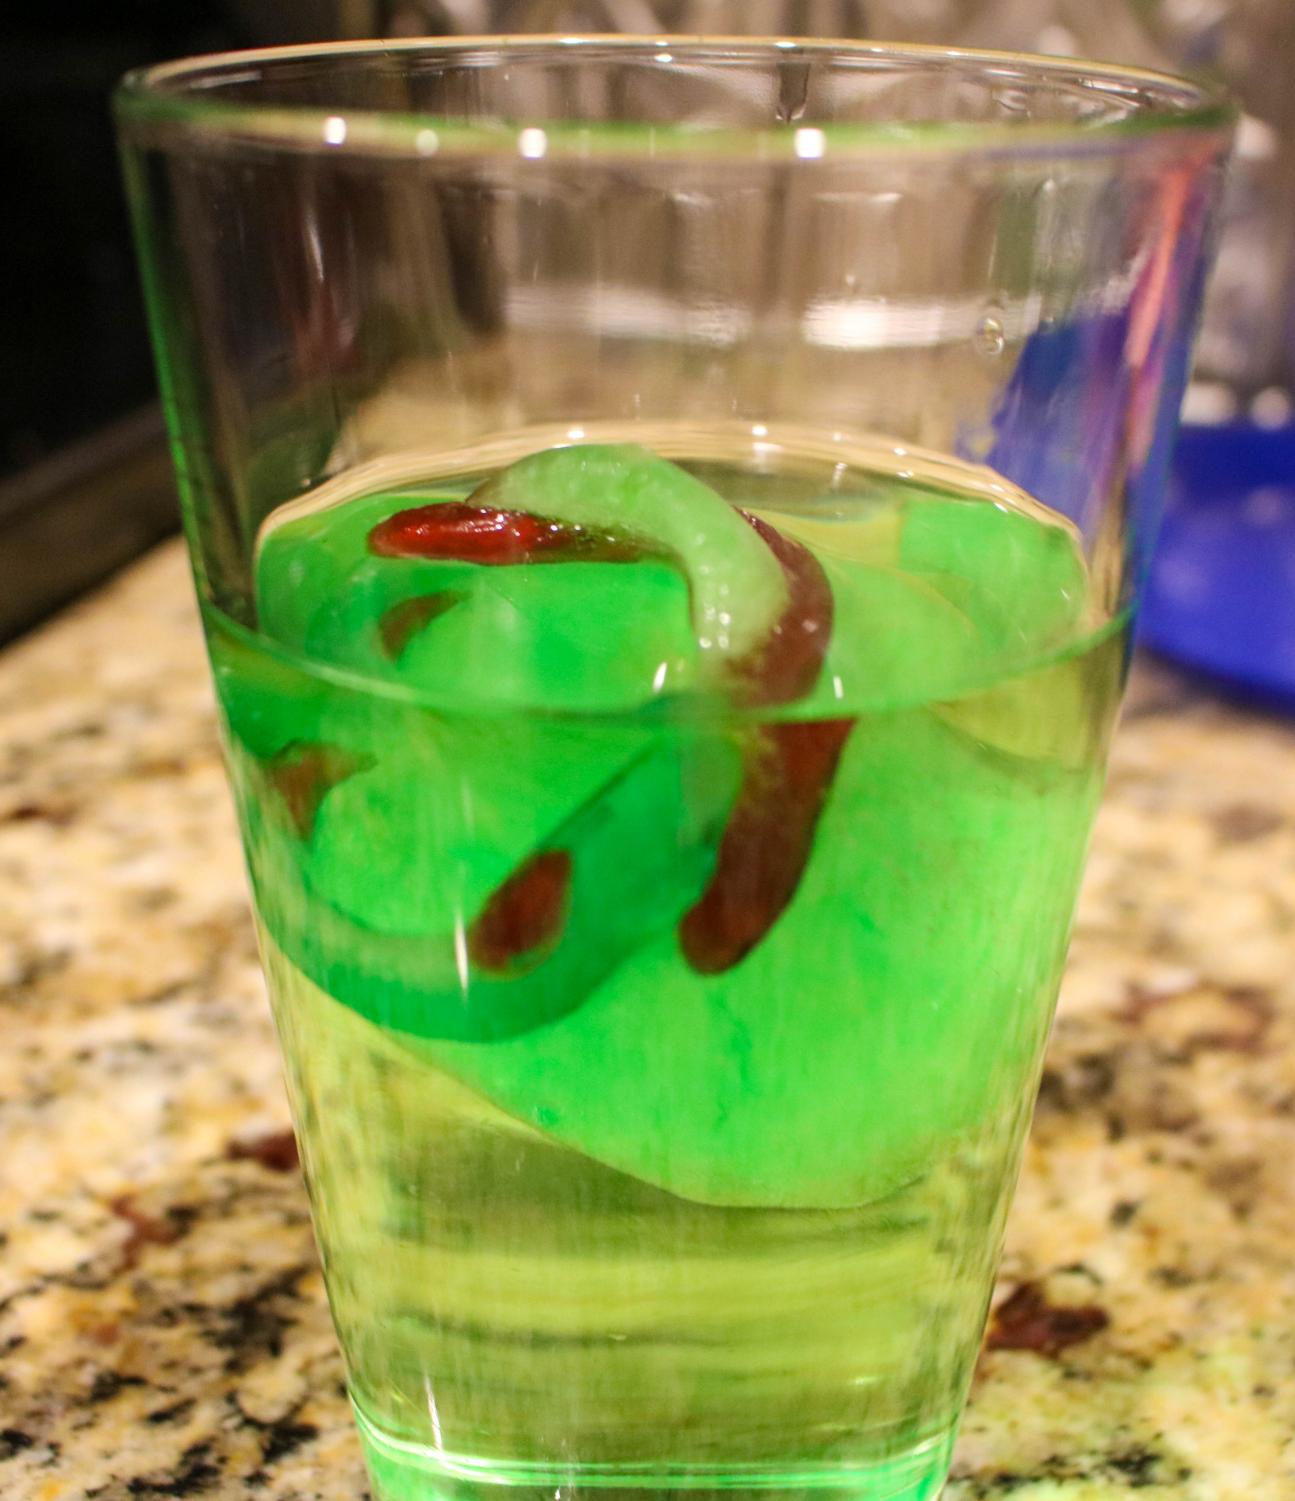
Beginner- Goblin Snake Kool-Aid
The first step to the Goblin Snake Kool-Aid is the Kool-Aid. This step is simple because it’s just adding the powder to the water. Normally you’d want to use a pitcher to mix the two together but I made a small sample portion.Now you get to mix and see the really cool green color.
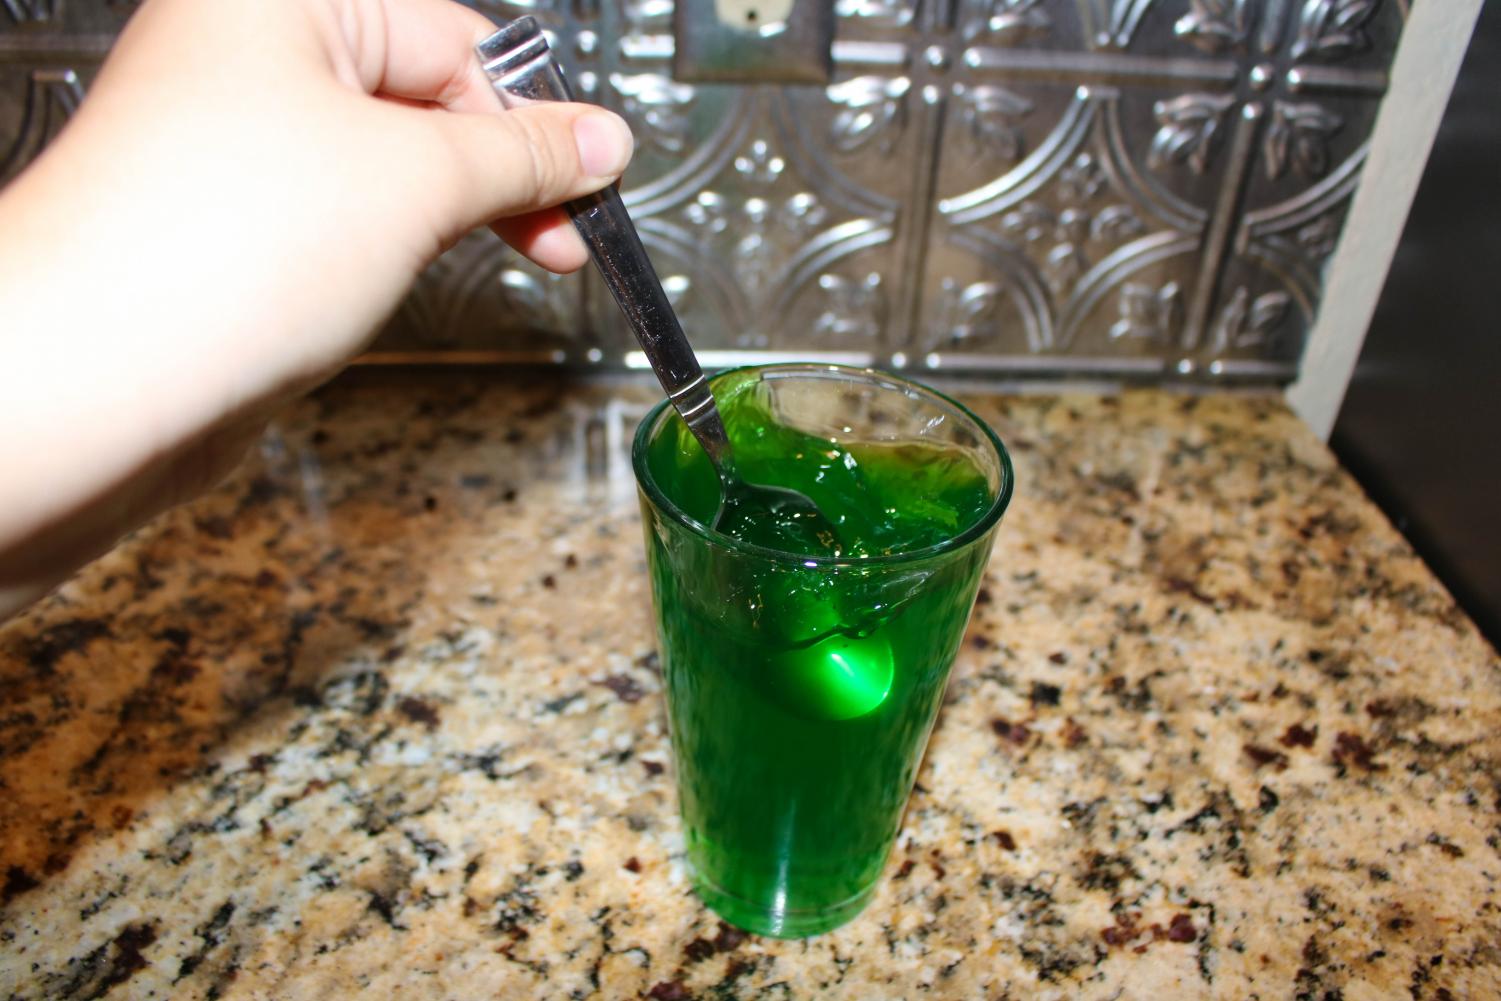
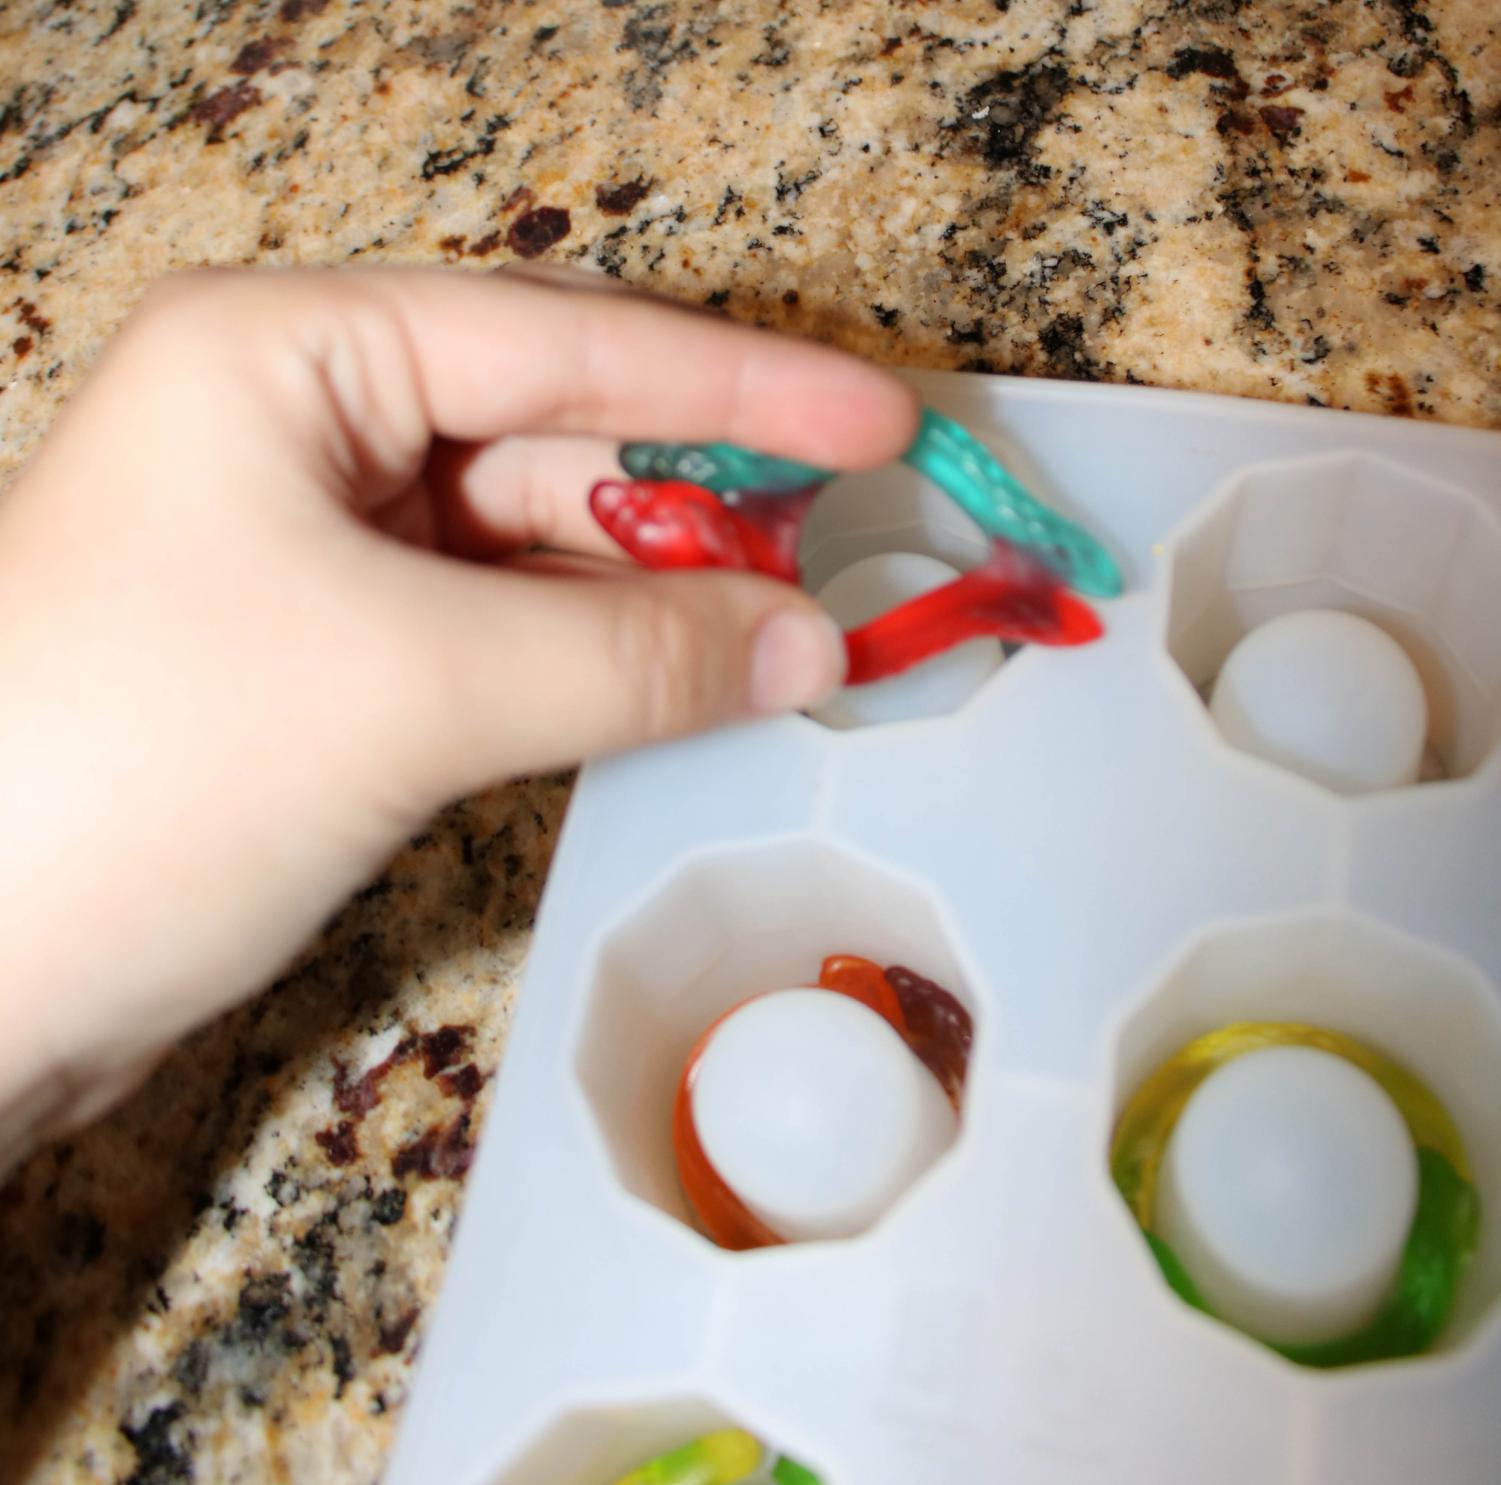
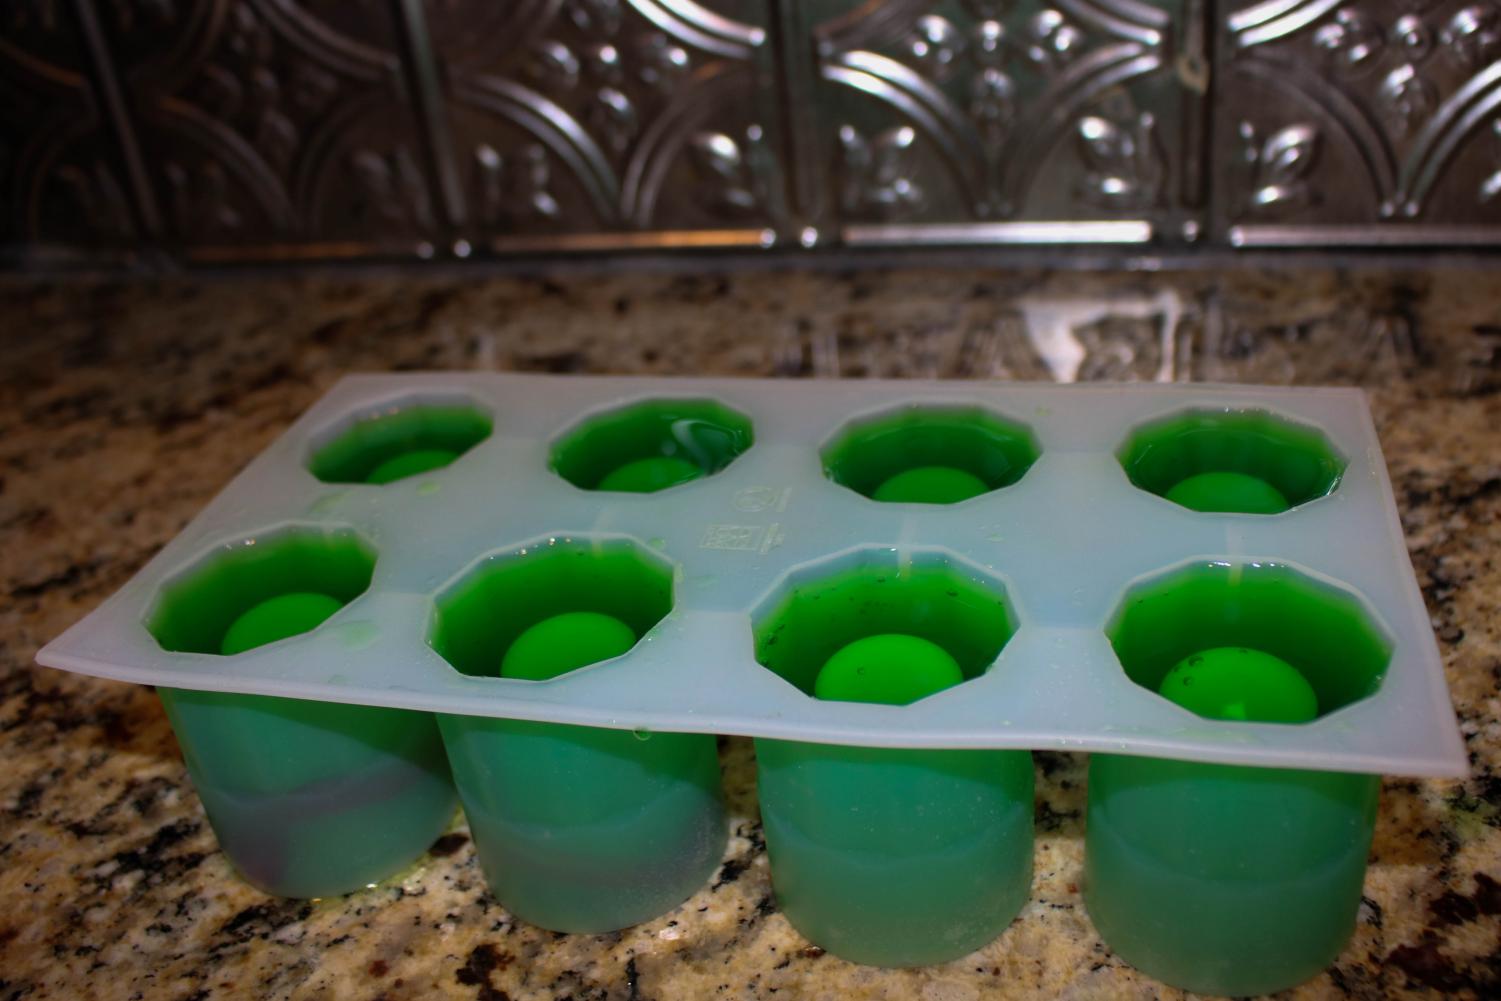
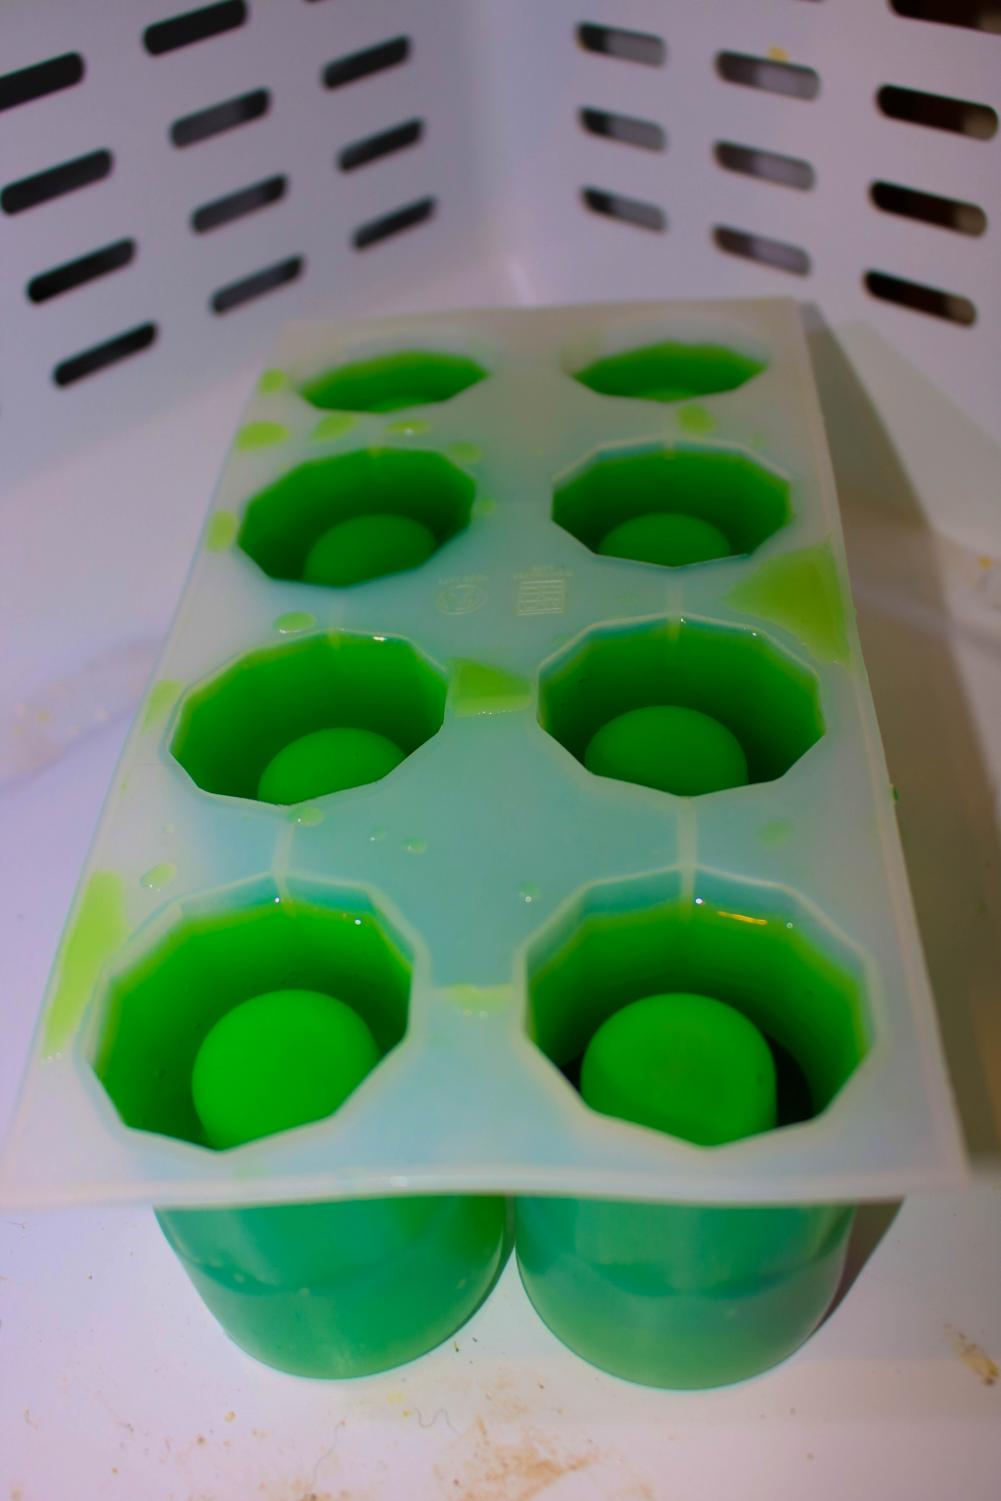
We have our Kool-Aid made, now we want to get our ice tray and put the gummy snakes in the bottom. Luckily the snakes are attached and my ice tray makes a cup so the two work perfectly together.Carefully pour in the liquid. TIP: use a funnel of just a spoon to easily pour in the Goblin drink without the mess.
Place in freezer. TIP: if you know ahead of time you want to make these put them in the freezer the night before.
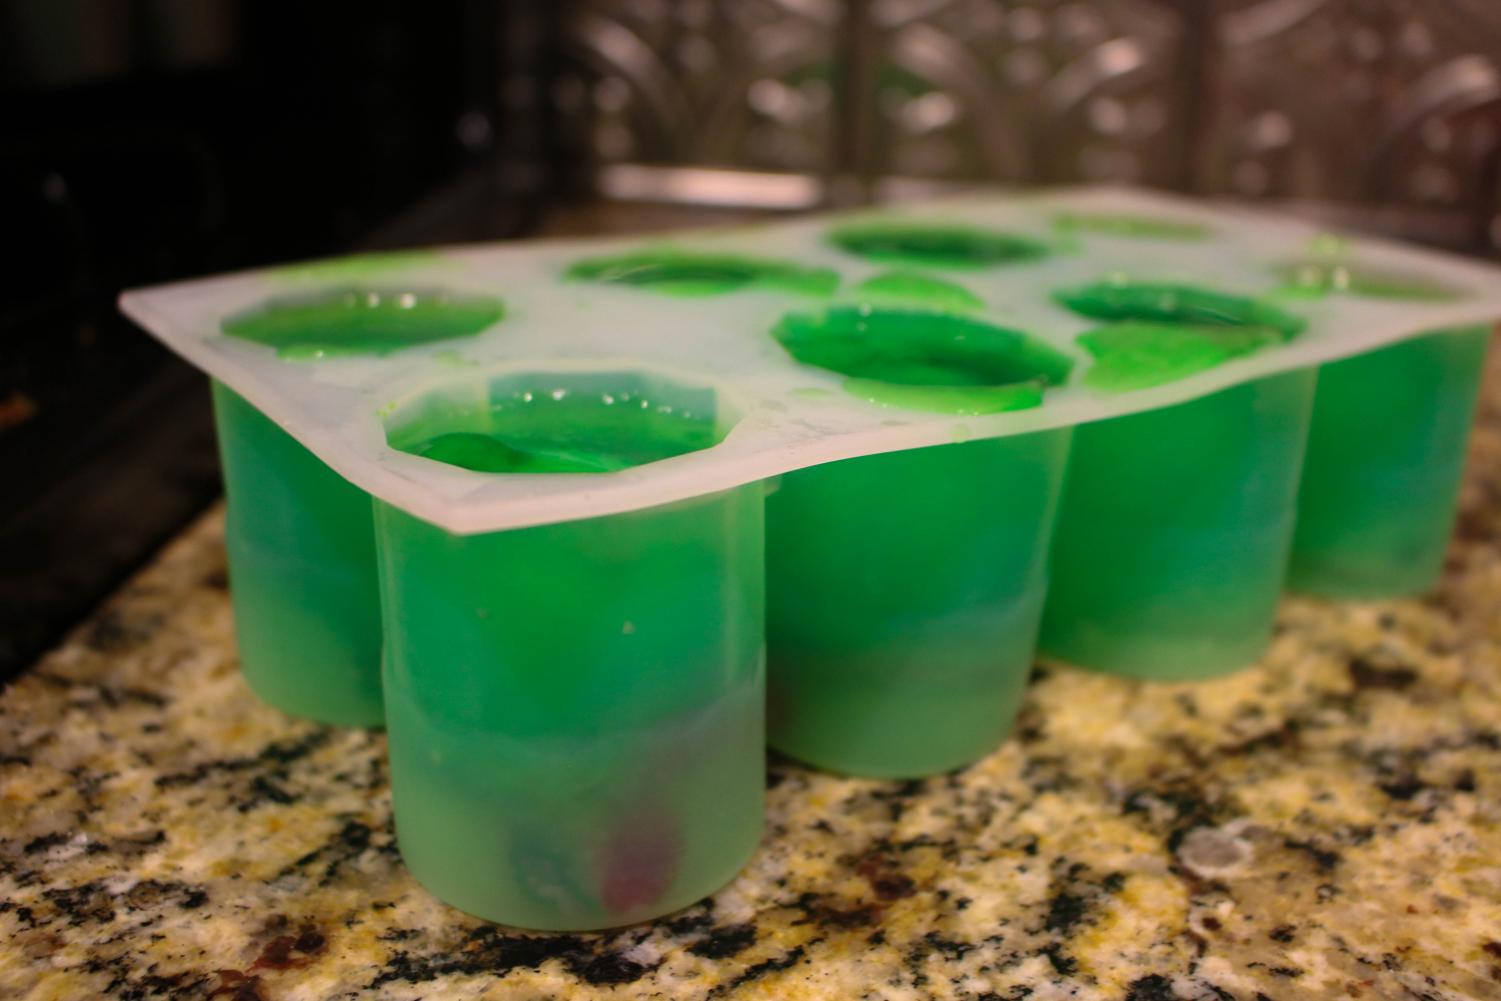
I let the ice tray sit on my counter for two minutes just to let it thaw a little bit, in hopes of making it easier to get the ice out. It worked.
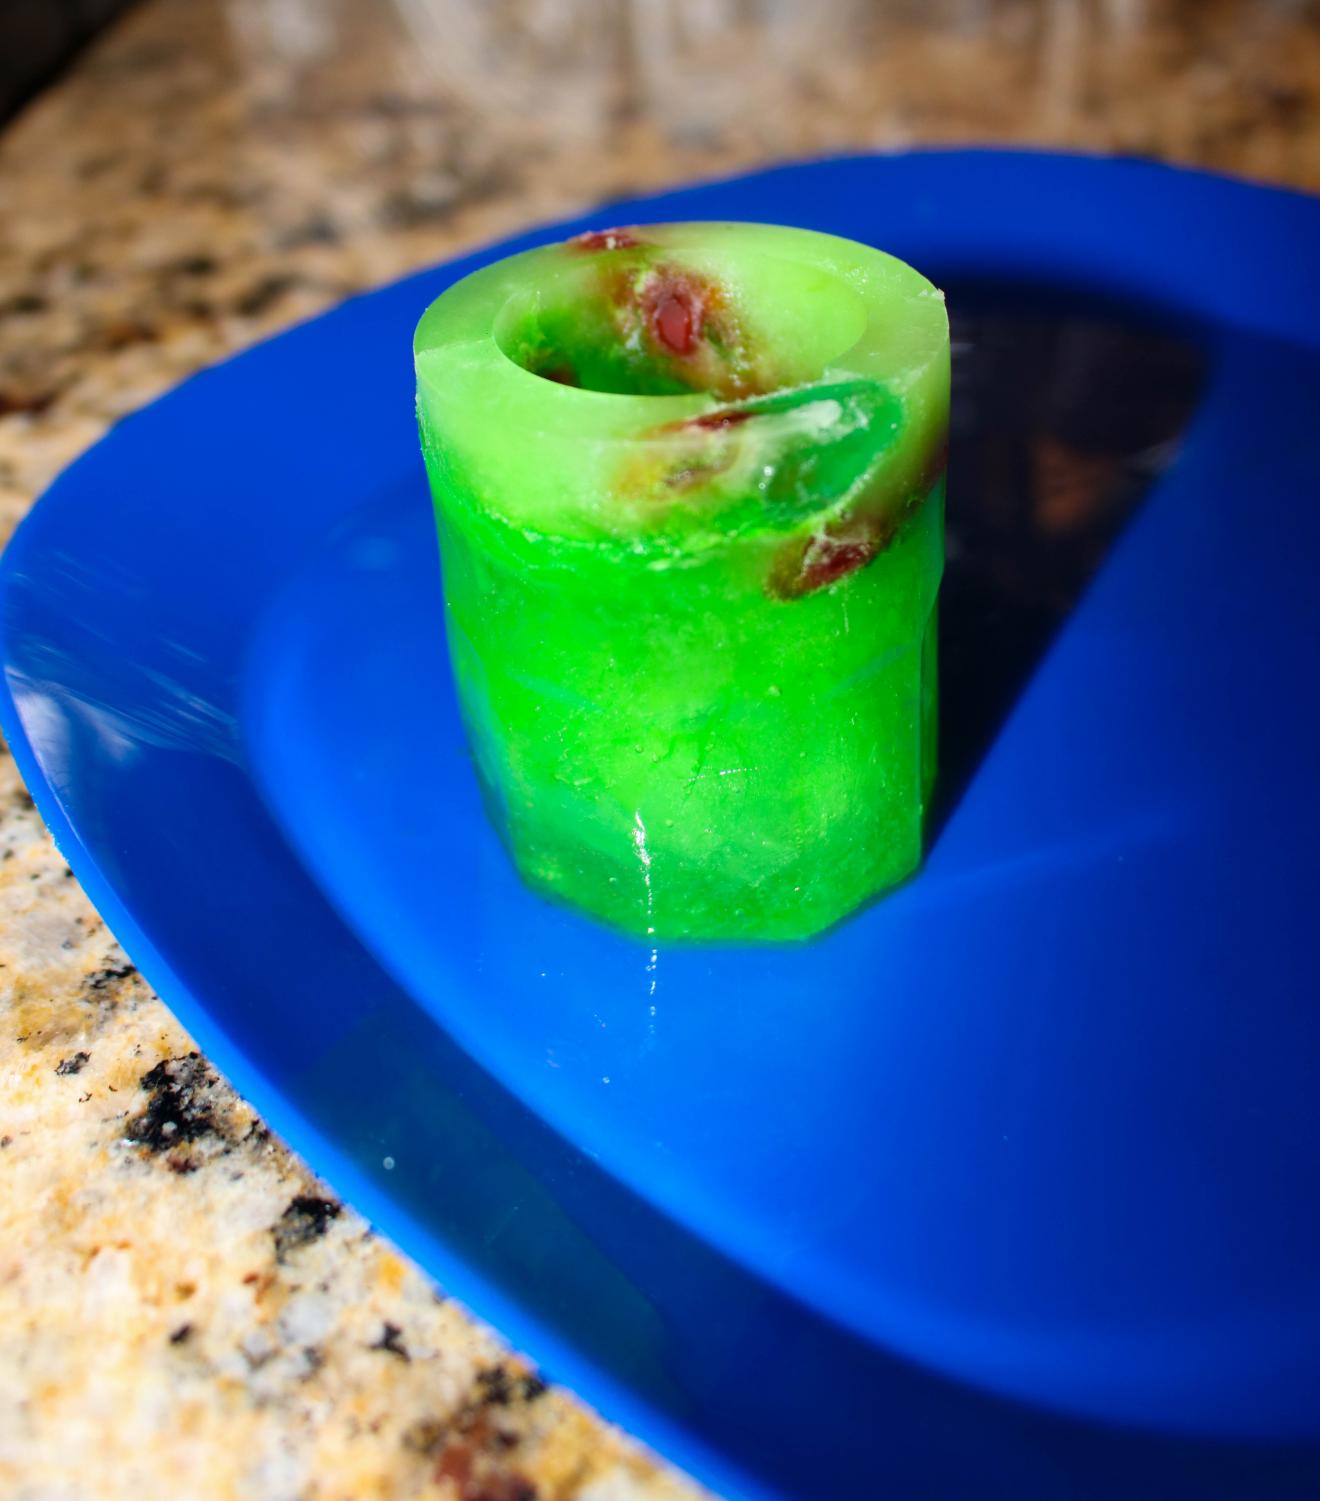
Now you have the option of using the ice cube as its own Goblin snake cup,
or putting the Goblin ice cube in another drink and watching the colour change, and the snakes dethaw.
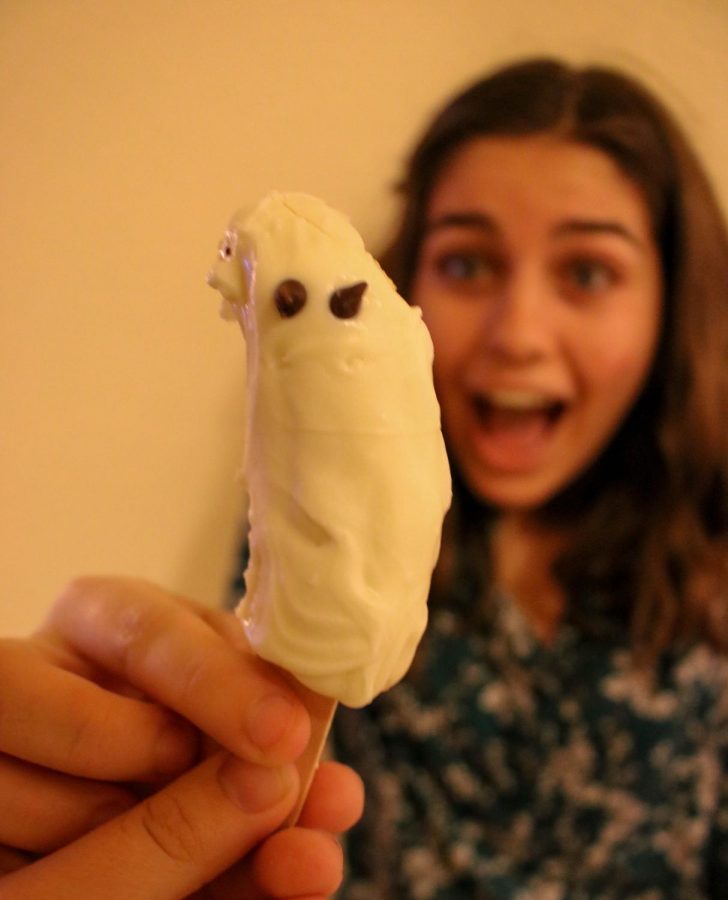
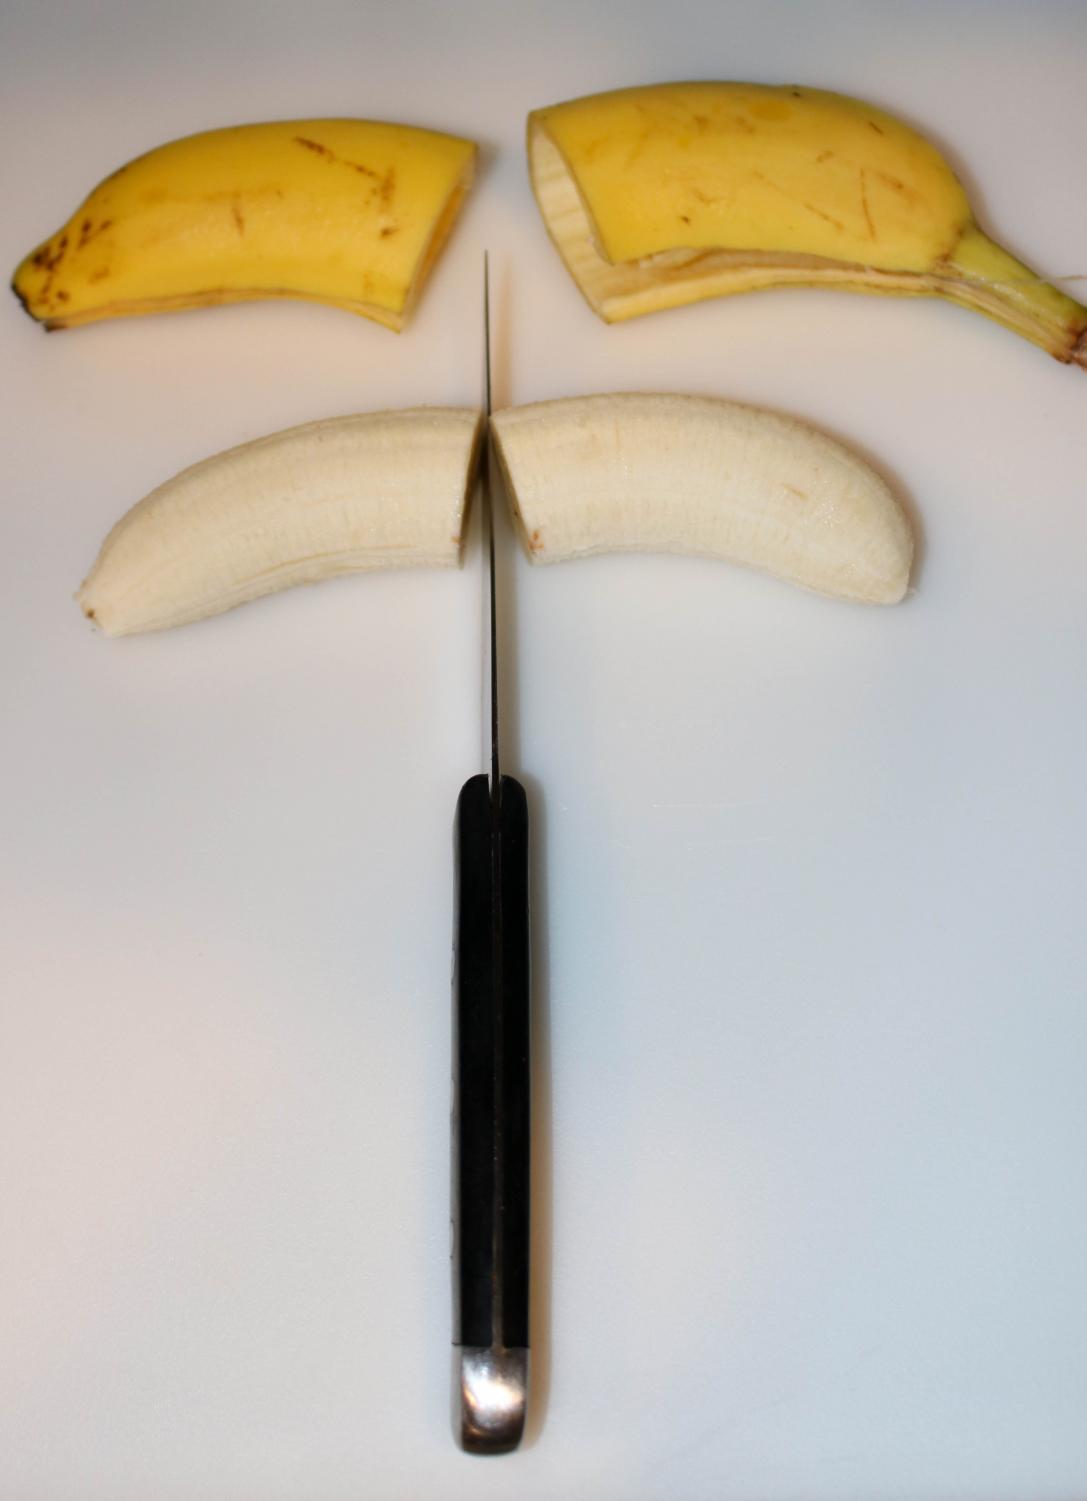
Advanced- “Boo-nana”
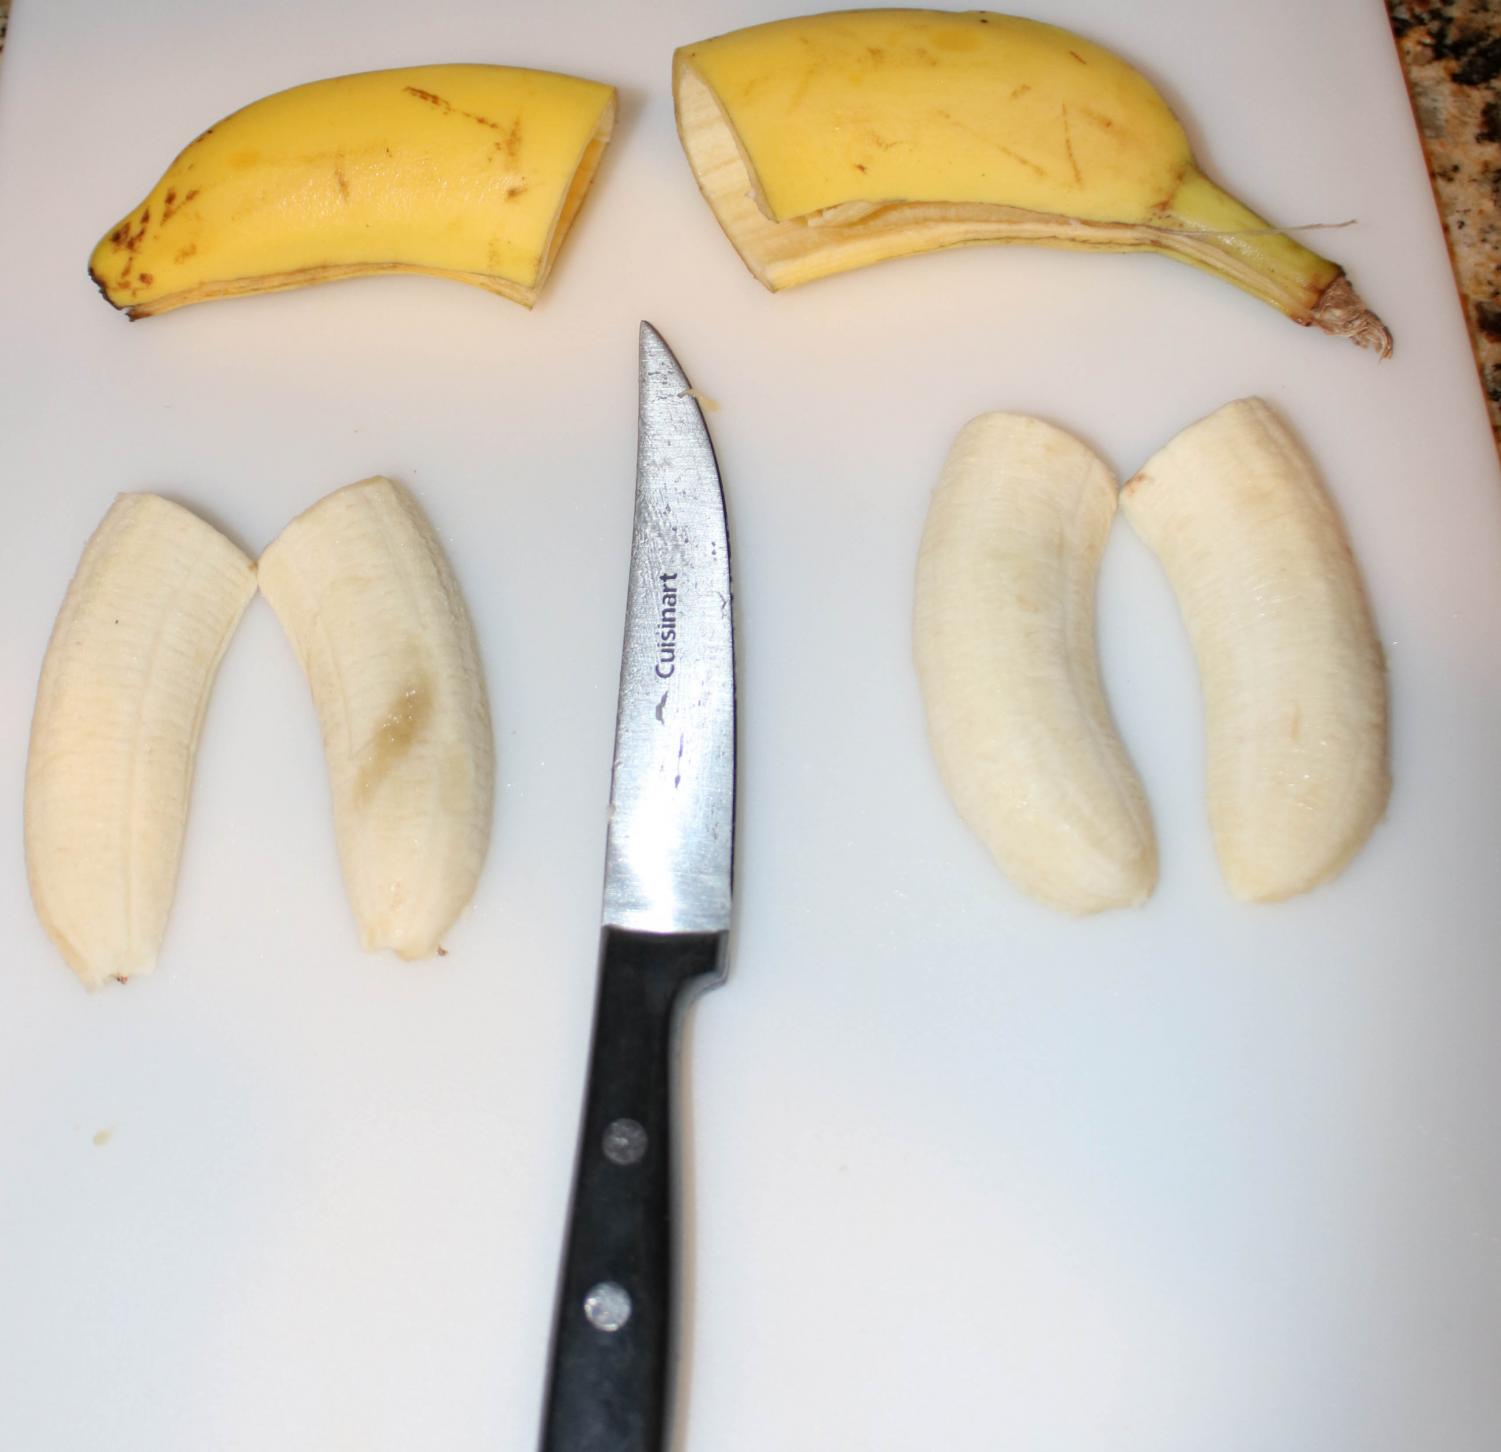
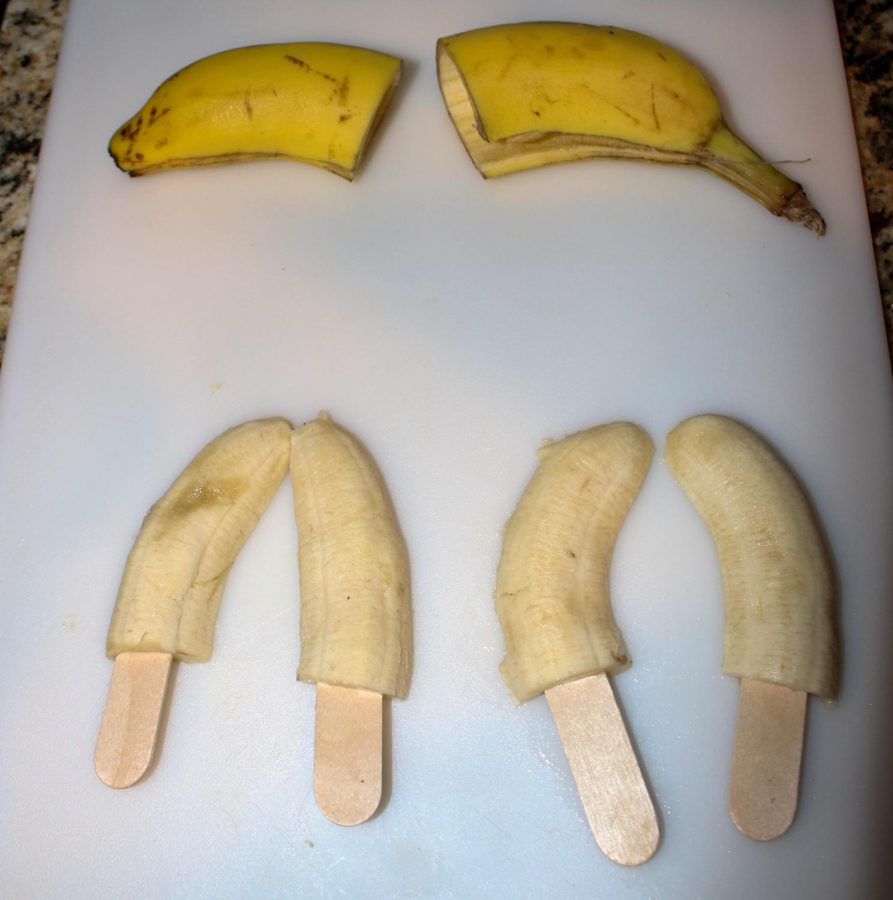
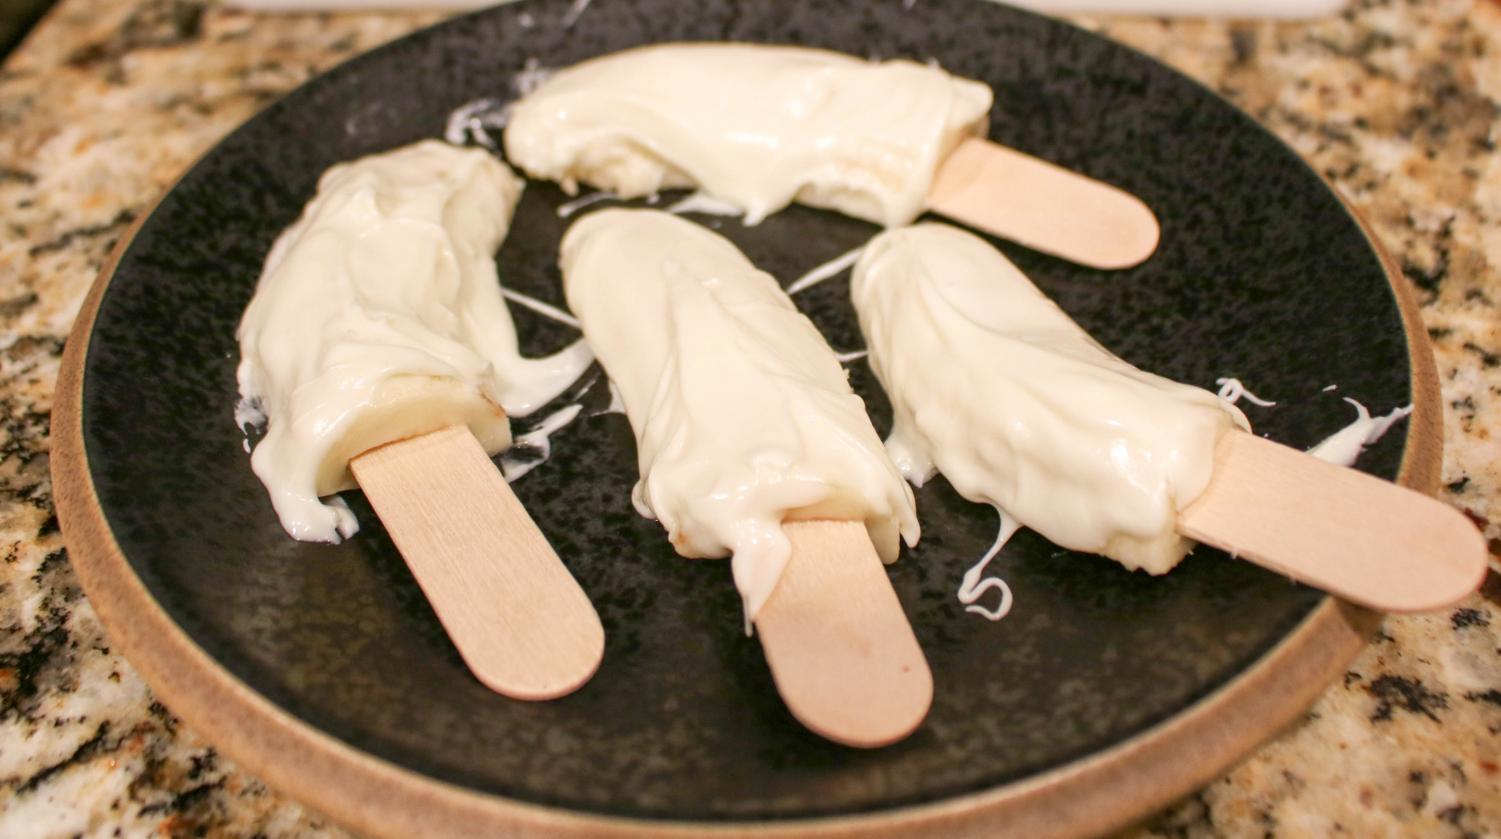
The first step of this is to cut then peel the banana, you can do that in either order I just preferred doing it this way.The second step it to cut our halves into fourths.This step was hard because I had to gently push the popsicle sticks into the bananas without accidentally mushing the fragile bananas. I also cut my popsicle sticks in half since they were too large, make sure there is no poking wood that could potentially harm the person eating the “boo-nana”. TIP: if you put the bananas in the freezer for five to ten minutes before cutting and peeling the process would be much easier.
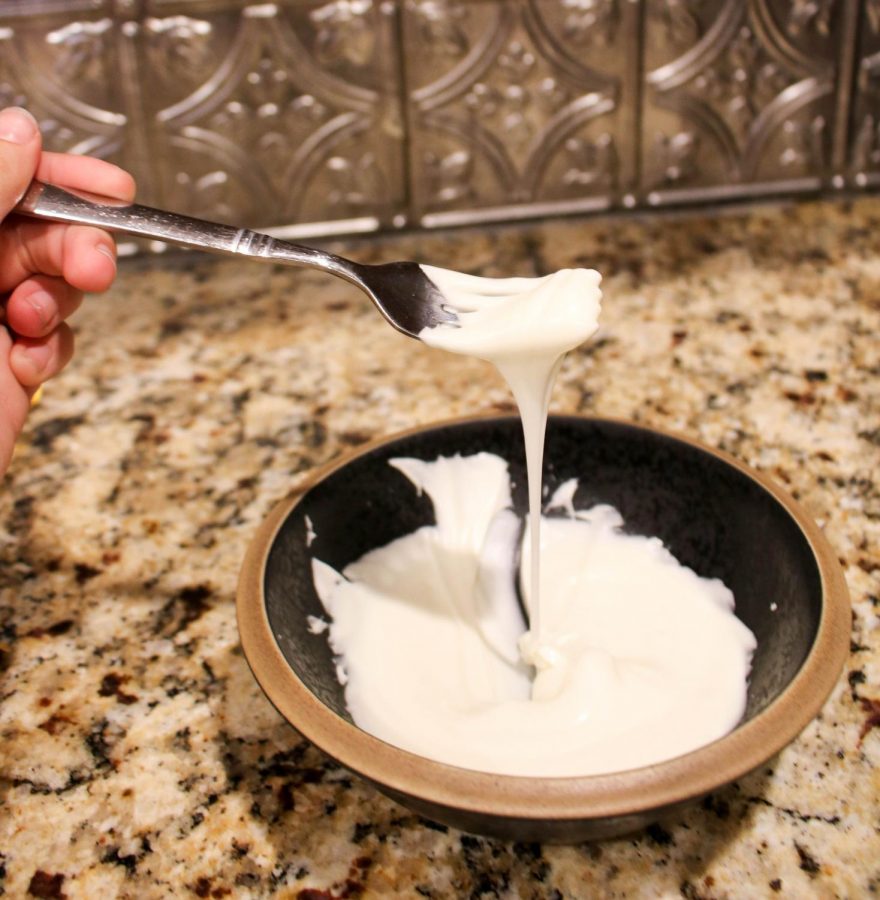
Now that the banana is on the stick and ready to go, you need to melt the dipping sauce. Get the white chocolate chips in a microwave-safe bowl and microwave it for 30 seconds. Then take it out and stir with a fork or spoon, then put it back in for another 30 seconds and stir again. After that minute you want to put it in for no longer than 15 seconds, but you need to keep on eye on it because it will become overheated and will dry up and curdle. TIP: mistakes do happen so don’t use all of you white chocolate when doing this because the chocolate is very sensitive. Also, if you do not want to use a conventional microwave you can get a pot of water boil it, and put a glass bowl on top and pour your chocolate in there and continuously stir– this acts as a broiler.Since your chocolate is melted you are going to want to pour it on your bananas as fast as you can before the chocolate hardens. Again it would definitely help here if your bananas were frozen. Since my bananas were not frozen I used a spatula, a fork would also work, to help pour the chocolate onto my bananas.
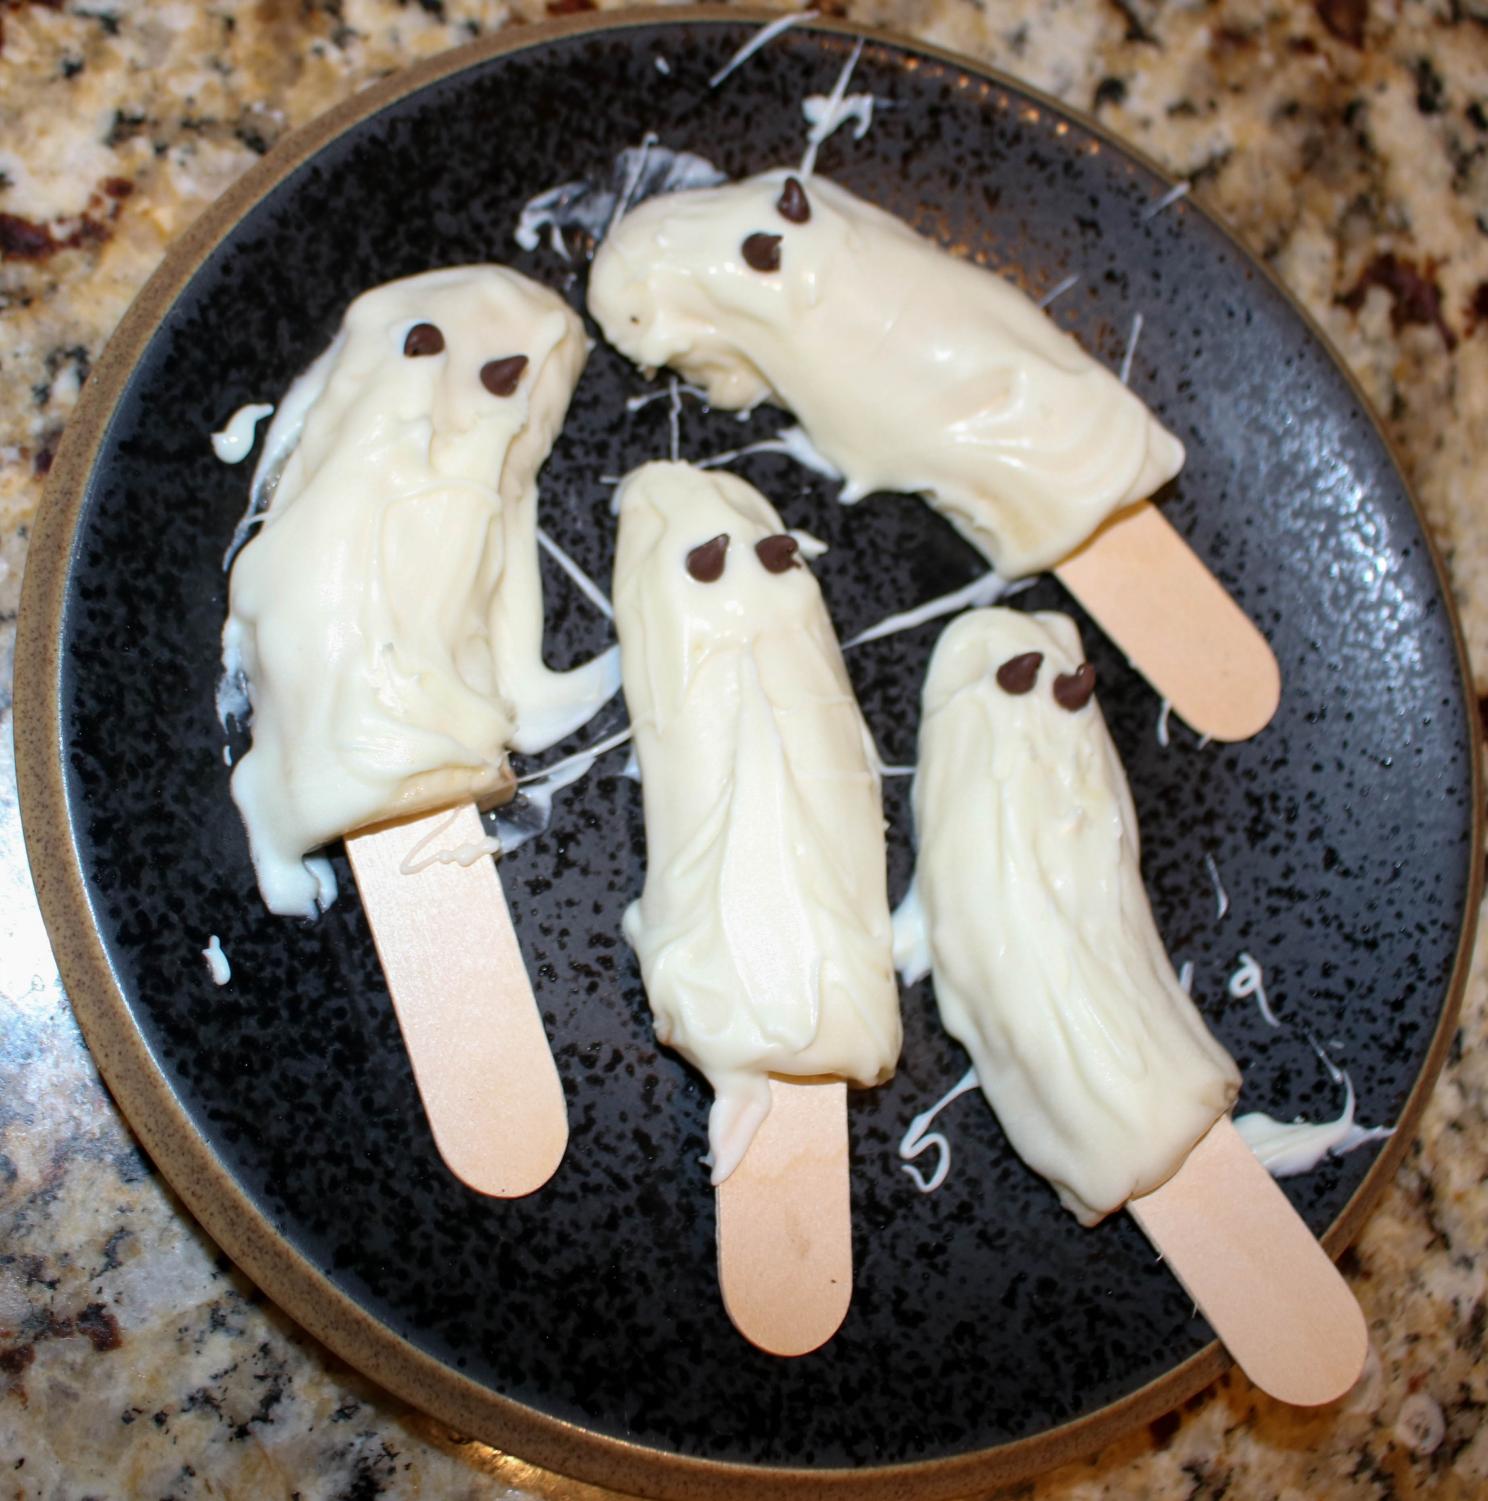
I then quickly put the mini chocolate chips on the bananas, as the ghosts eyes. TIP: save some melted white chocolate to pour where you want the eyes because by the time I was ready to place the eyes on the chocolate had nearly completely dried. Also when you clean up be sure to use hot water, it will melt the chocolate and cleanup will be much faster.
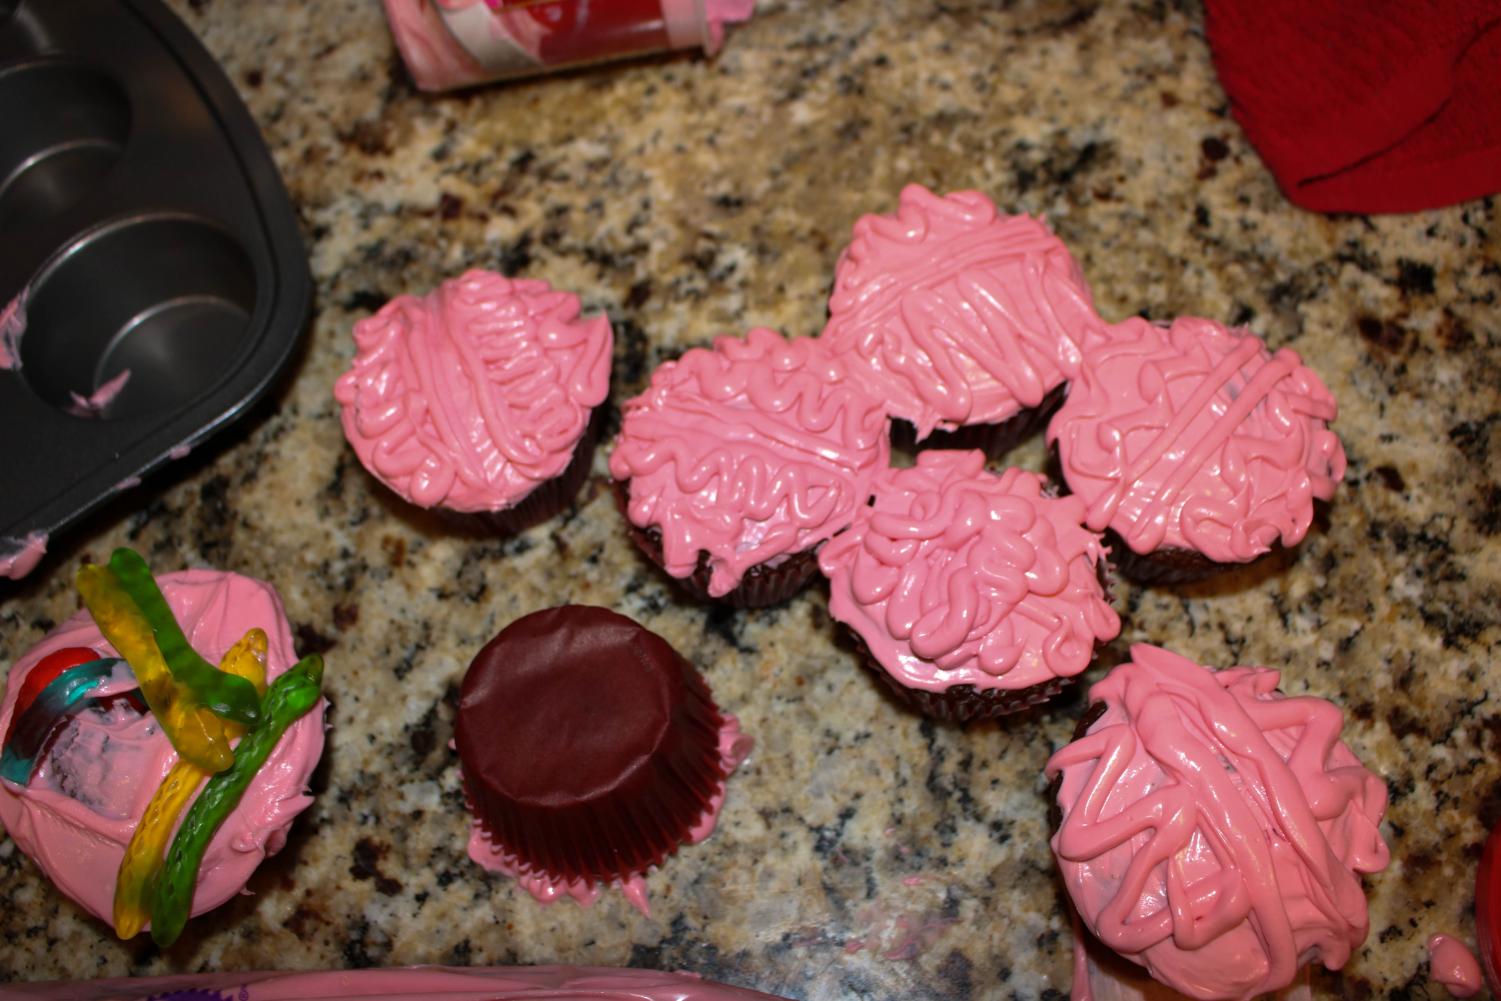
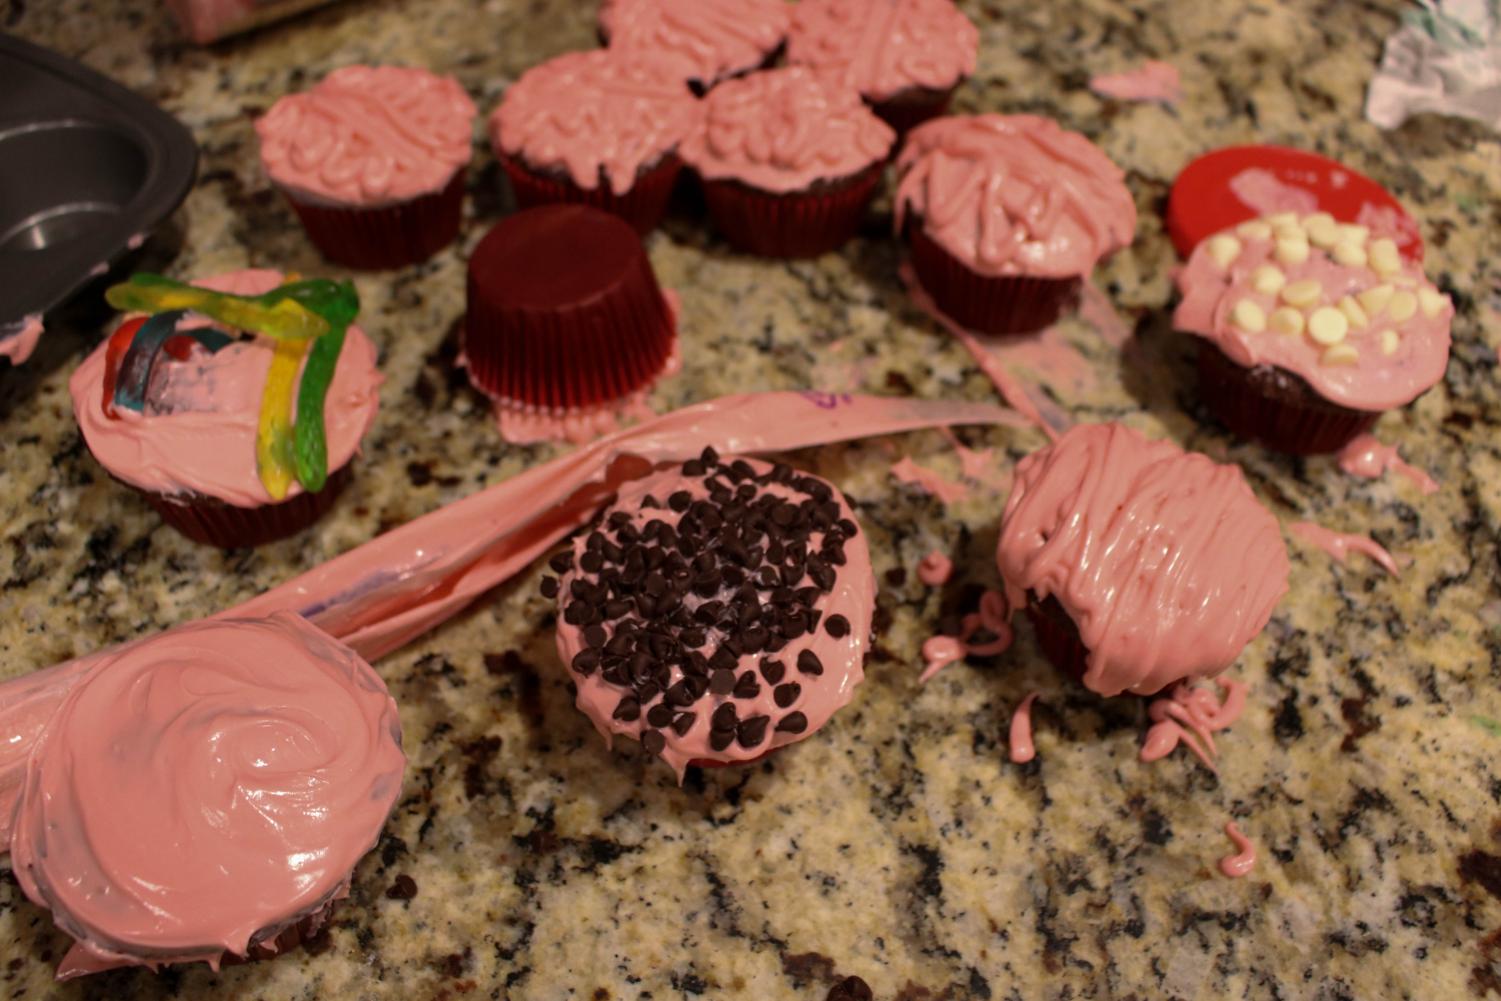
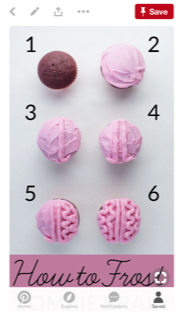
Professional- Brain Cake
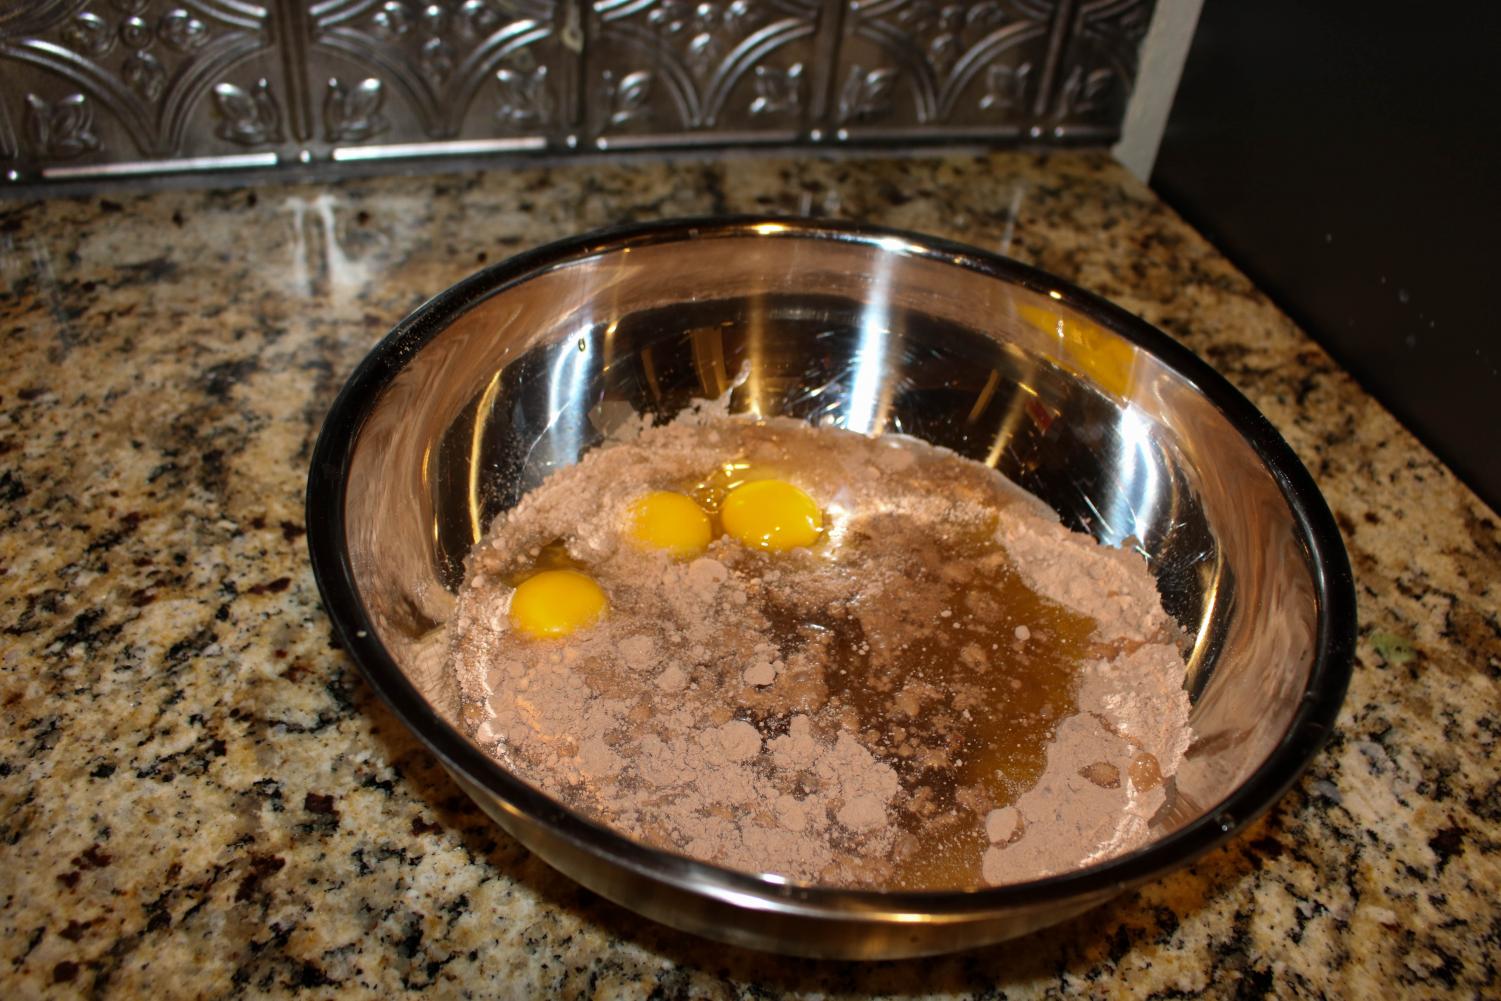
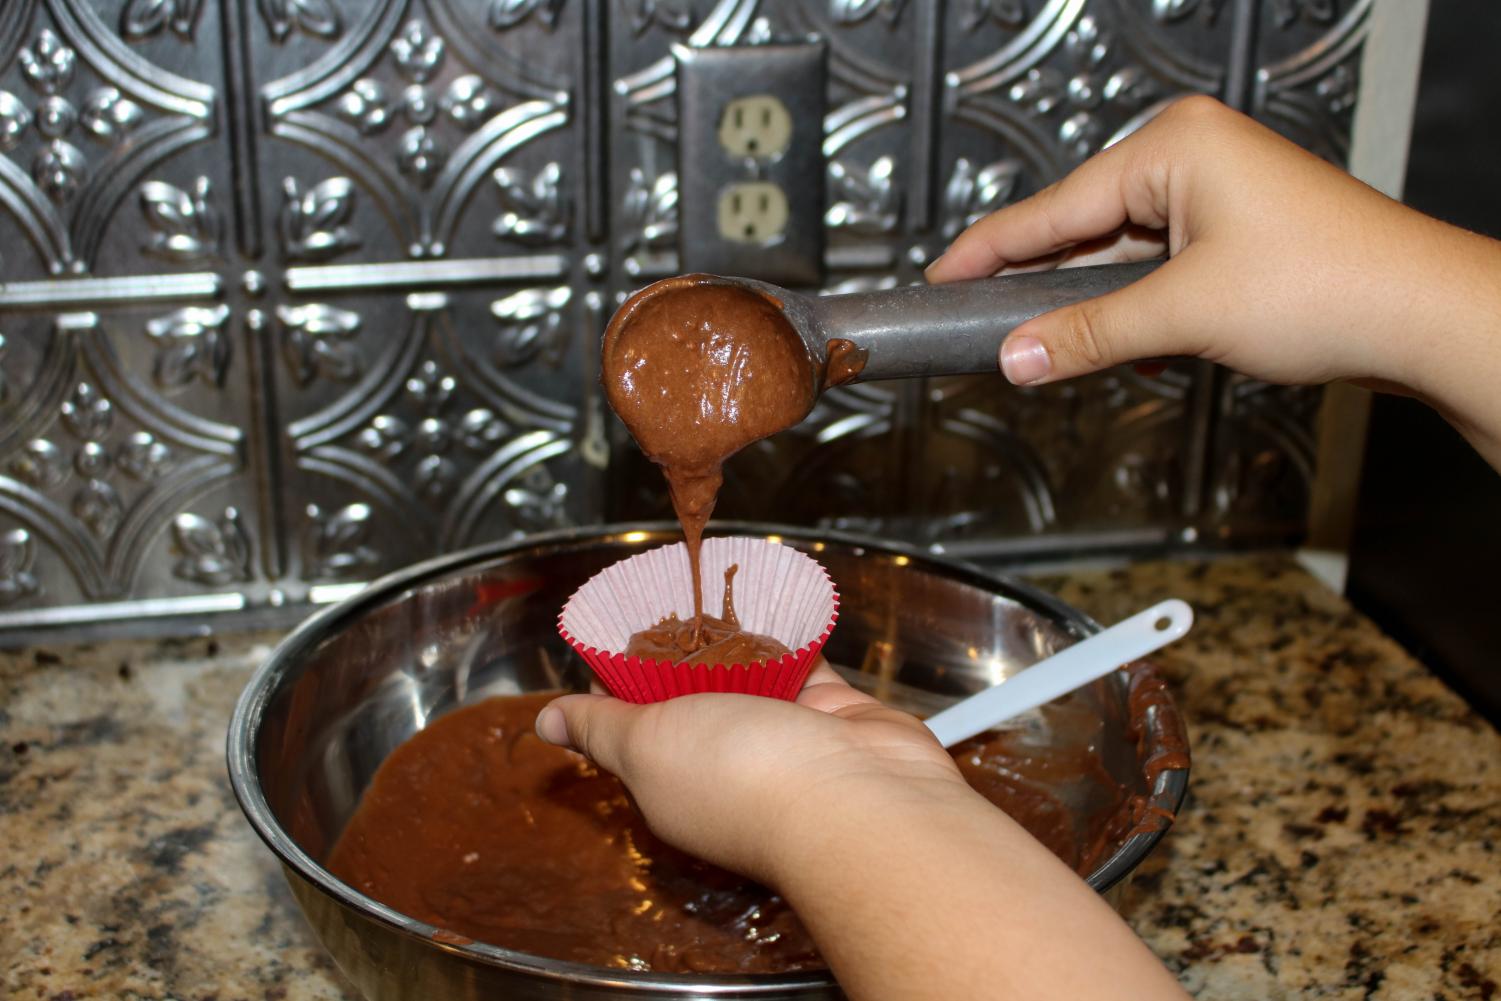
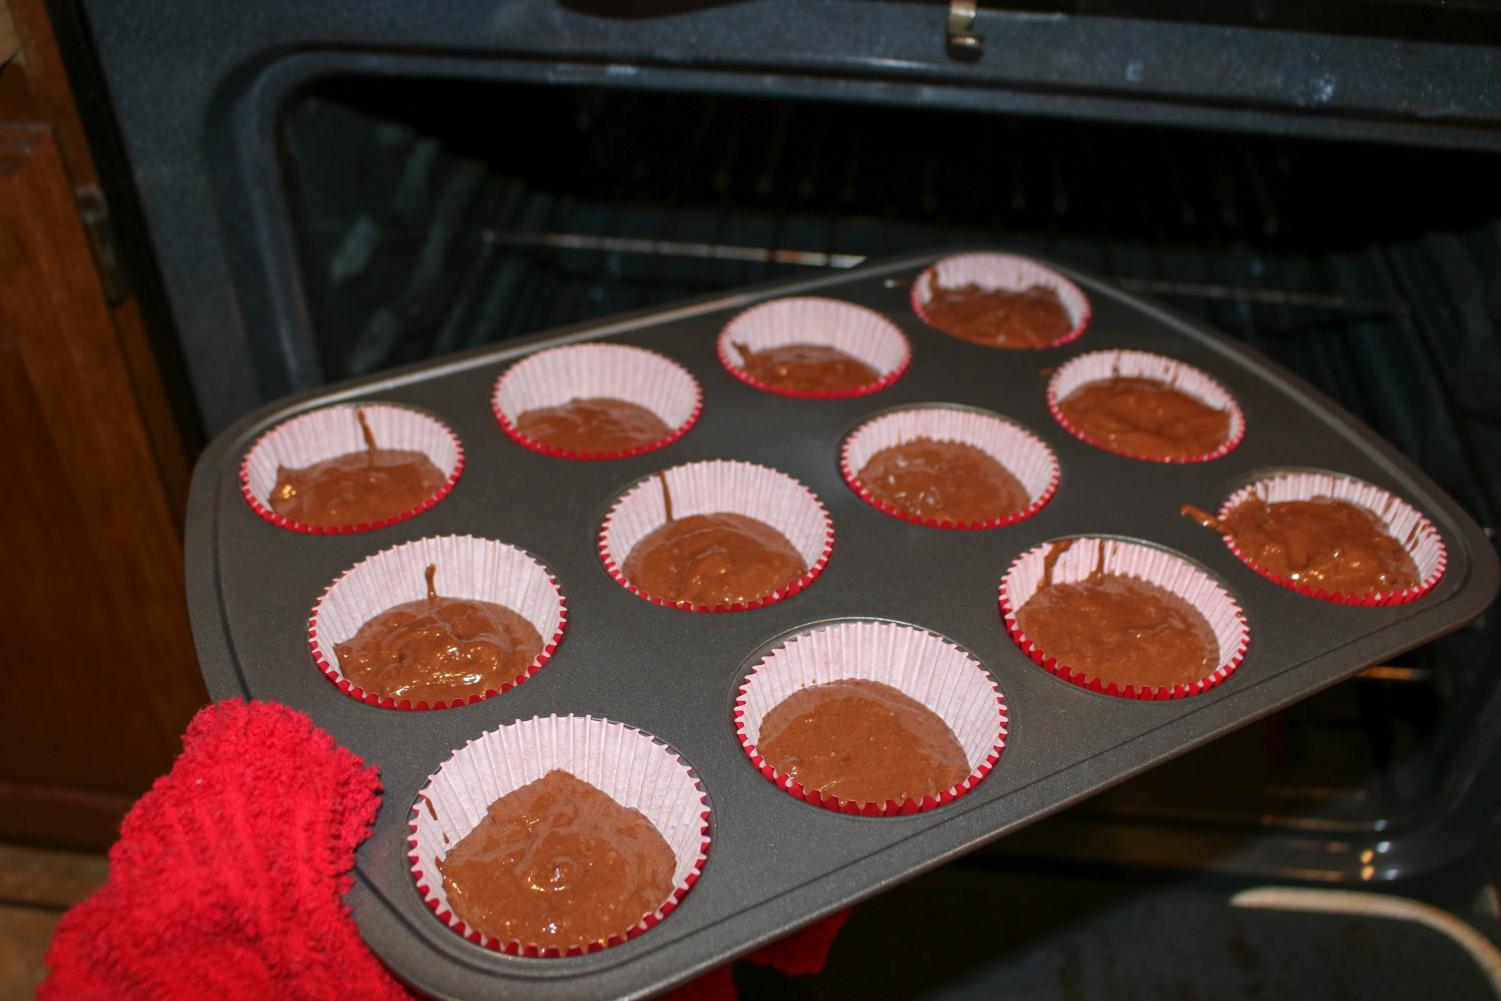
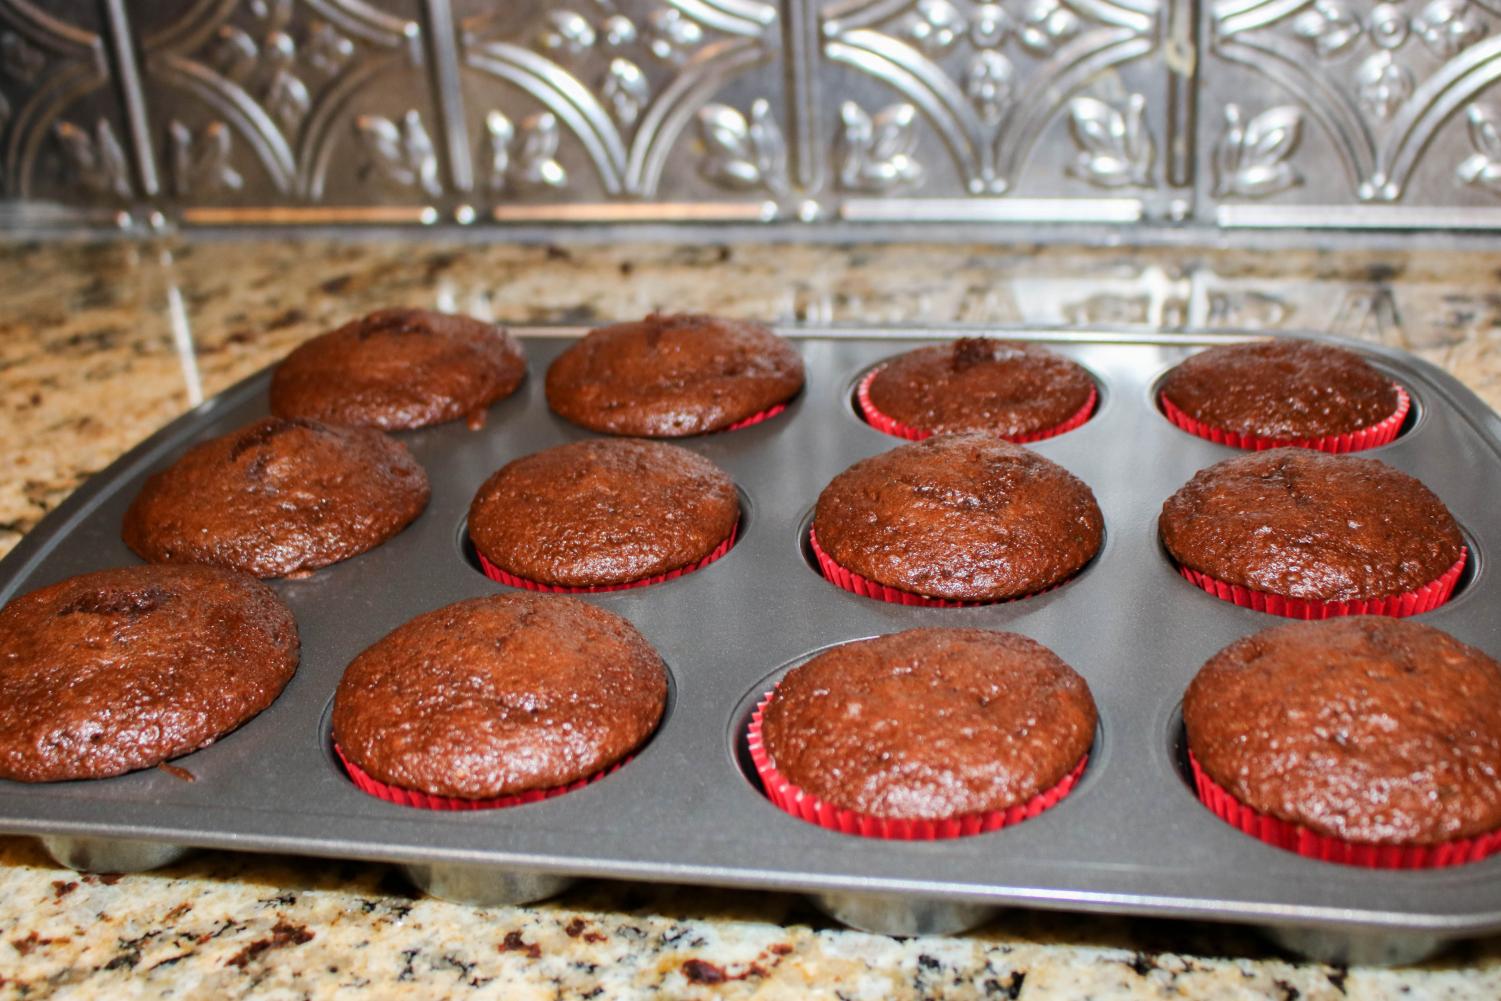
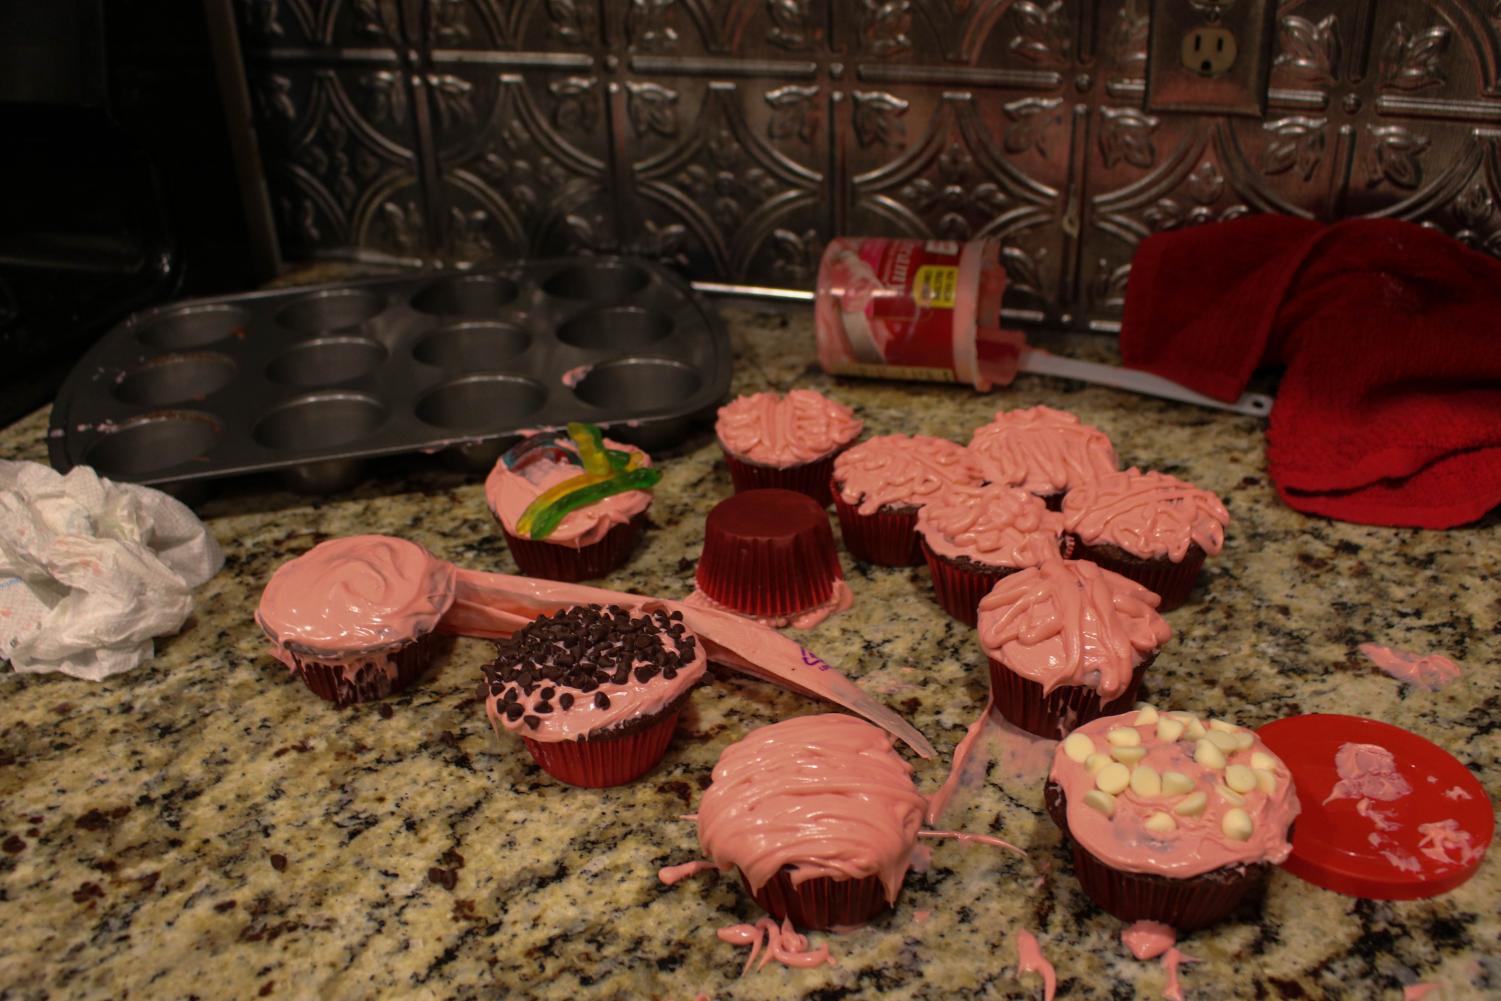
For the cupcakes’ I just used a cake mix, three eggs, one cup of water, and 1/3 cup of vegetable oil. You could also make the chocolate cake batter from scratch which would just be 3/4 cups of softened butter or margarine, three eggs, two cups sugar, two cups flour, 3/4 cup of unsweetened cocoa powder, one teaspoon of baking soda, 3/4 teaspoon baking powder, two teaspoon vanilla, and one and 1/2 cup milk. TIP: always use a larger bowl than necessary so there is no chance of overflow.After getting our ingredients in the bowl we want to mix them together to make our batter. I prefer to use a spatula when mixing because whisks can be useful but the batter always gets stuck and it’s just a hassle. You can use any utensil to mix you can use a handheld or electric mixer, it just depends on personal preference.After we make our batter we need to prep our cupcakes for baking. I always use paper linings in my cupcake because it’s easier to clean up and cancels out the need for non-stick spray. TIP: when scooping it helps to lift the paper linings out and to use an ice cream scooper. You can also use a spoon, but its faster to measure how much batter is in each holder. Also note that the batter will wise when being cooked so don’t fill it more than halfway.Now that the paper linings are full with batter it’s time to bake. You want your cupcakes to bake for 18 to 21 minutes. TIP: check the cupcakes as 18 minutes and be nearby when the alarm goes off afterwards if they aren’t done yet.After taking the cupcakes out of the oven, it’s smart to check that they are completely done by either poking the cupcakes with a toothpick or fork. NOTE: sometimes cupcakes look done from the top but are still runny so double checking can’t hurt.After checking that your cupcakes are thoroughly baked you want to let them sit out for five to ten minutes. The next step is to frost, and if we don’t wait for the cupcakes to cool down the frosting will liquidate and become runny. TIP: do not set the cupcakes on top of your oven because they will not cool down, set them on a surface that can handle the heat.This is where my cupcakes went from good to spooky– but it’s okay because it’s Halloween and you can just pretend that your failures are intentional.It’s okay if you mess up a few, or in my case all of them, because now you can get creative and slap some gummy snakes and candy on top.The important part of DIYs is that you had fun making the end product, and the cupcakes still will taste great.
For those of you professional DIY-ers here’s the instructions how do the frosting. I’m just going to stick with my beginner DIYs, but if you do any of these DIYs post it on social media and tag us!
Prices-
All of the following are products from HEB unless stated otherwise
Nestles Mini Semi-Sweet Chocolate Chips $2.22
Nestles Premier White Chocolate Chips $2.22
Haribo Twin Snakes $.85
Jumbo Craft Sticks $2.49
Strawberry-N-Cream Frosting $1.64
Premium Bananas $.48 per banana
Kool-Aid Lemon Lime $.24 per packet
Additional Featured Products
Spatula $3.00
Toothpicks $1.79
Wilton Piping Bag $6.29 (Amazon)
Cupcake Tin $4.48
Cupcake Lining $1.75
Ice Cream Scoop $.88
Ice Cup Tray $12.99 (Amazon)
Leave a Comment
Donate to The Dispatch
$100
$1000
Contributed
Our Goal
Your donation will support the student journalists of James Bowie High School. Your contribution will help cover our annual website hosting costs. Any contributions made through this service are NOT tax deductible. If you would like to make a tax deductible donation OR to subscribe to our print edition, please contact us at [email protected].
As the end of the year comes to a close, the Starlight Theatre Company (STC) has an array of events. Senior directed plays, class musical, musical theatre revues, officer applications, and preparing for...
Donald Trump has made a clear suggestion that Immigration and Customs Enforcement should be renamed to National Immigration and Customs Enforcement, or otherwise known as NICE.
His idea is that by giving...